Hacking an off the shelf Bluetooth beacon
Dec, 03 2022
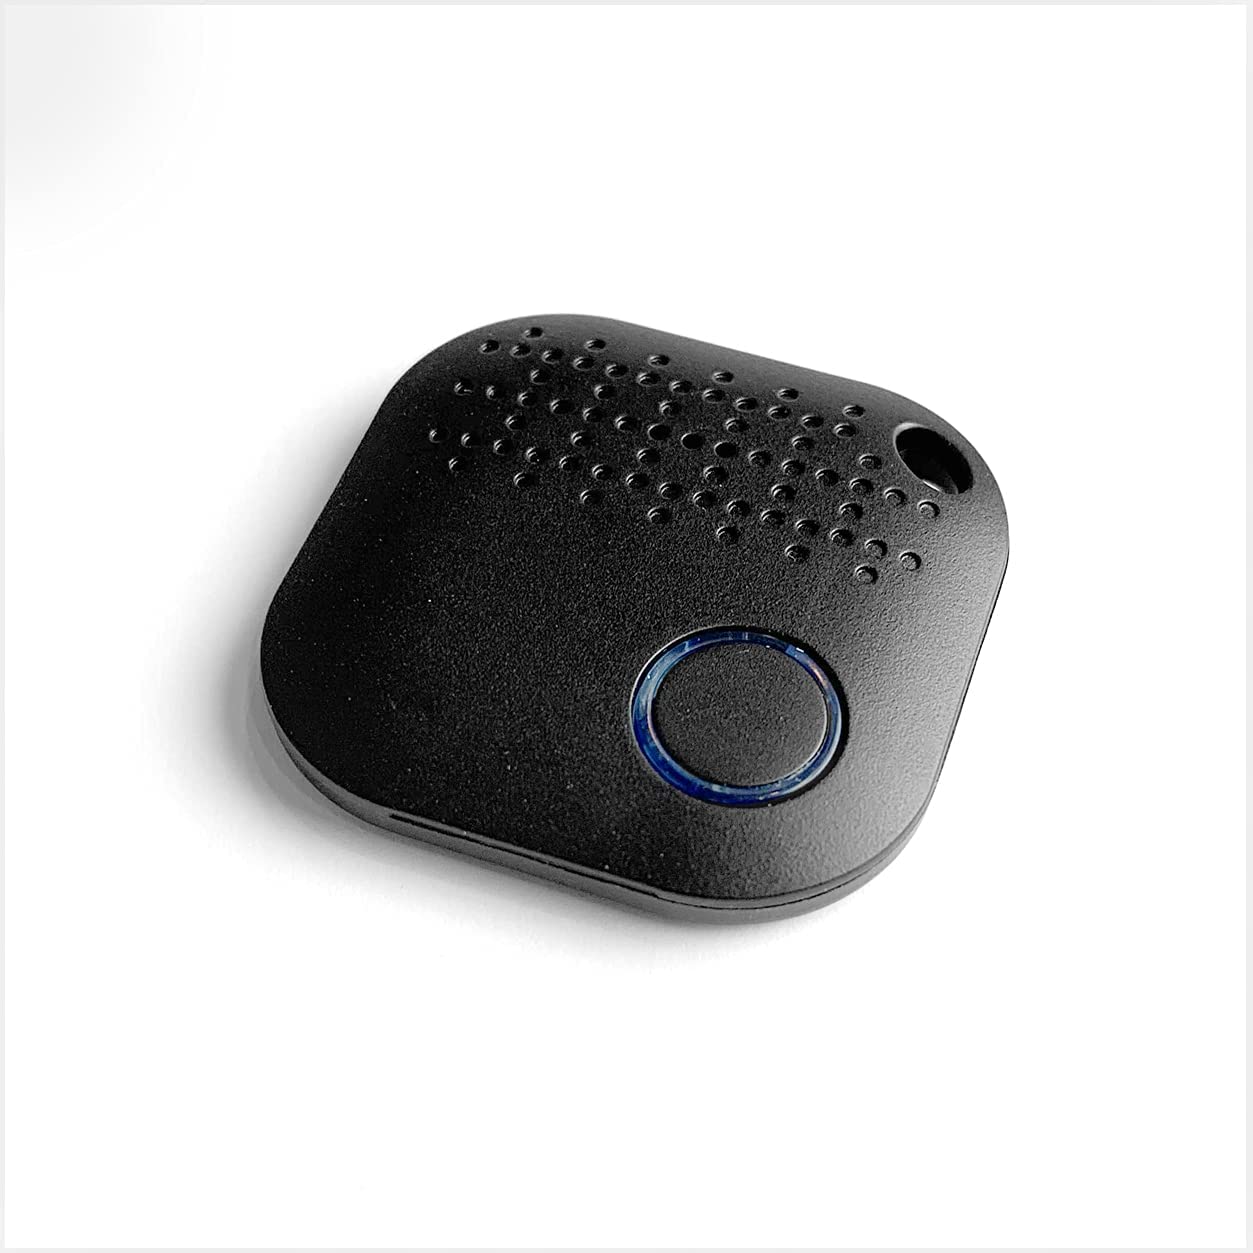
These Bluetooth beacons are cool because they come with a tidy housing and a few nice peripherals like an LED, button, buzzer, and accelerometer.
They're advertised to use as an iBeacon. But, since they have an nRF52 chip inside I thought to try and flash Zephyr RTOS onto the device and write custom applications to it.
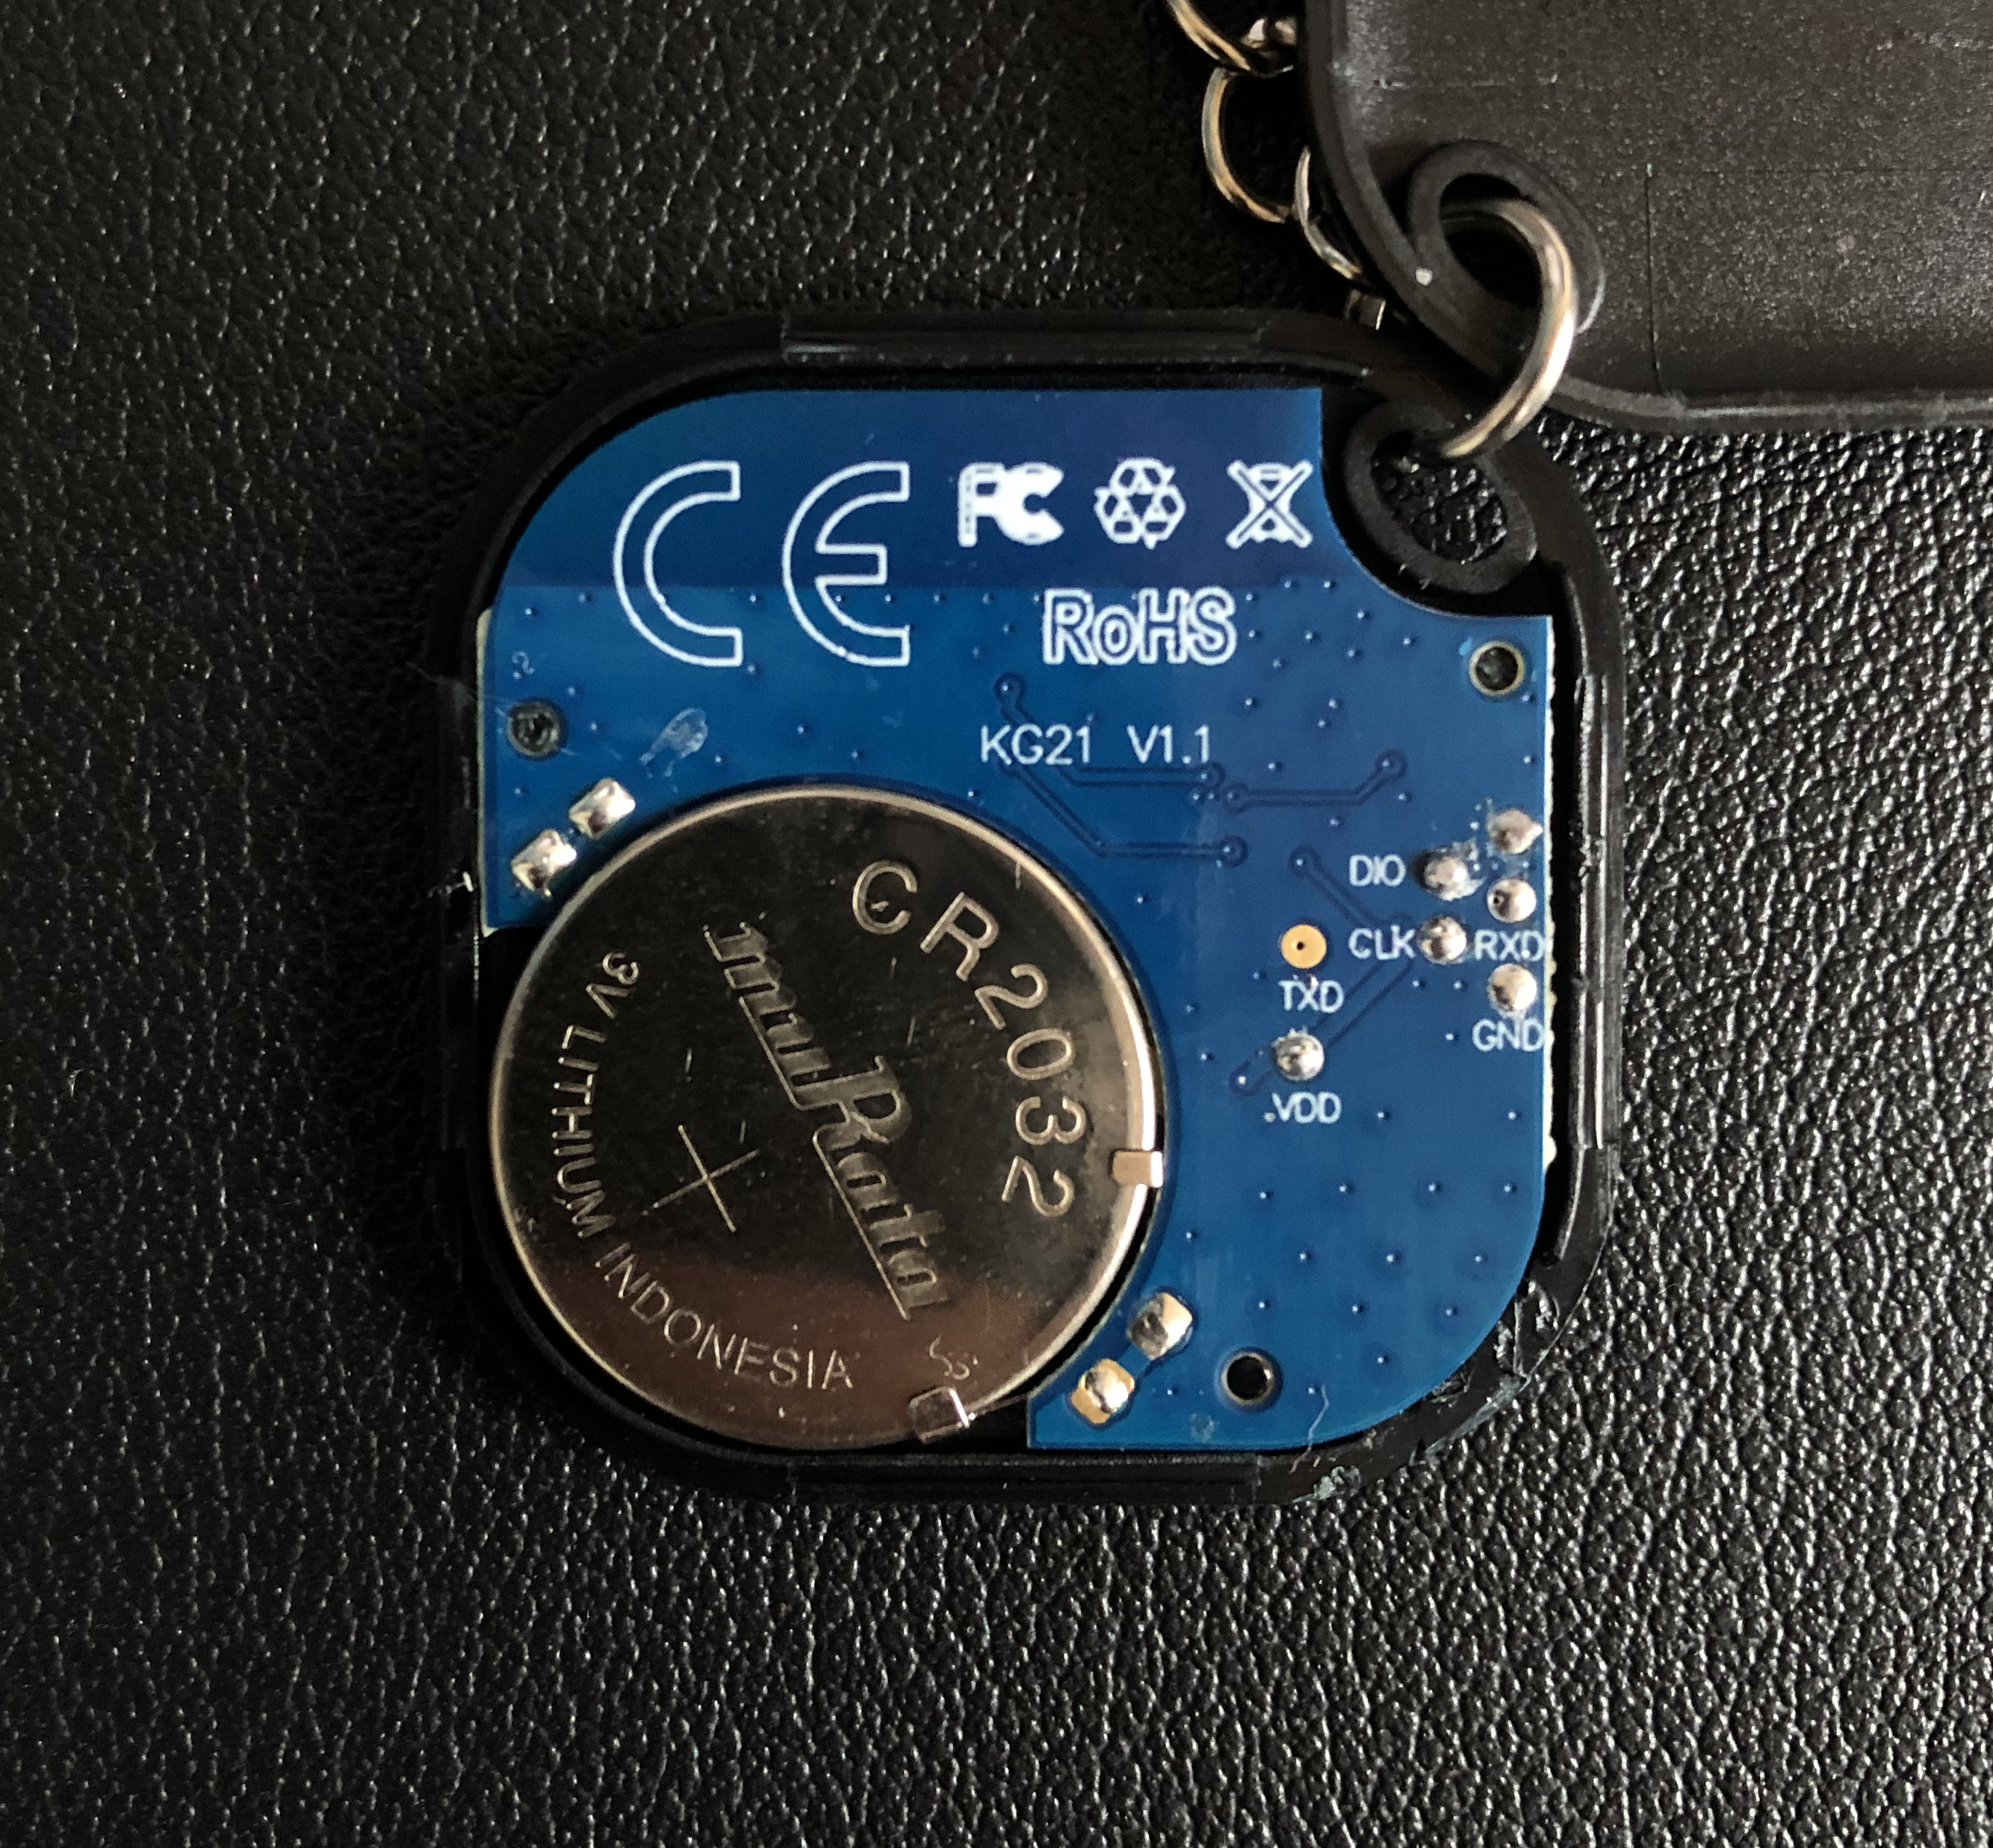
Identifying the programming pins of our Bluetooth Beacon
On BlueCharm's website they call out the nRF52810 chip family as the IC for these devices.
Lucky for us, Zephyr supports this IC out of the box, and the programming pads for the nRF chip are clearly labeled on the PCB.
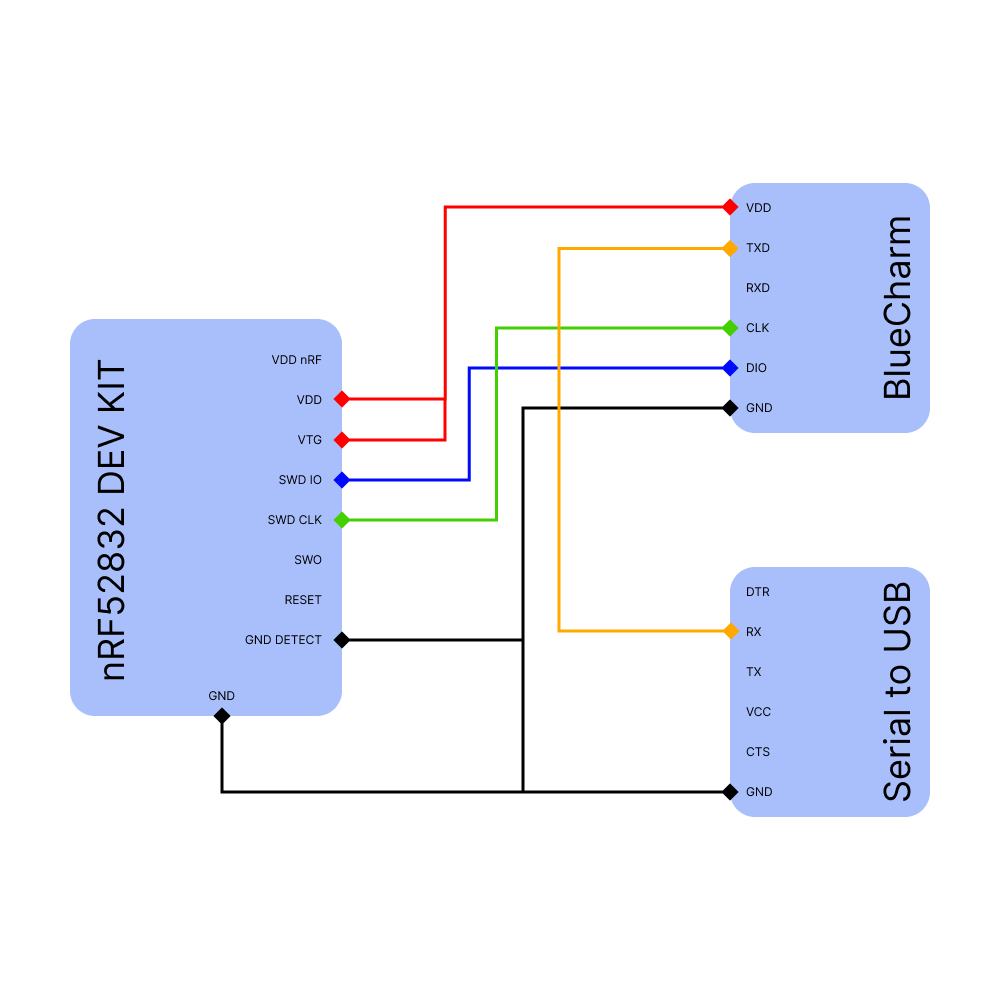
Soldering a few wires onto the pads allows us to connect the Blue Charm device to our nRF52 dev kit and our serial to USB converter.
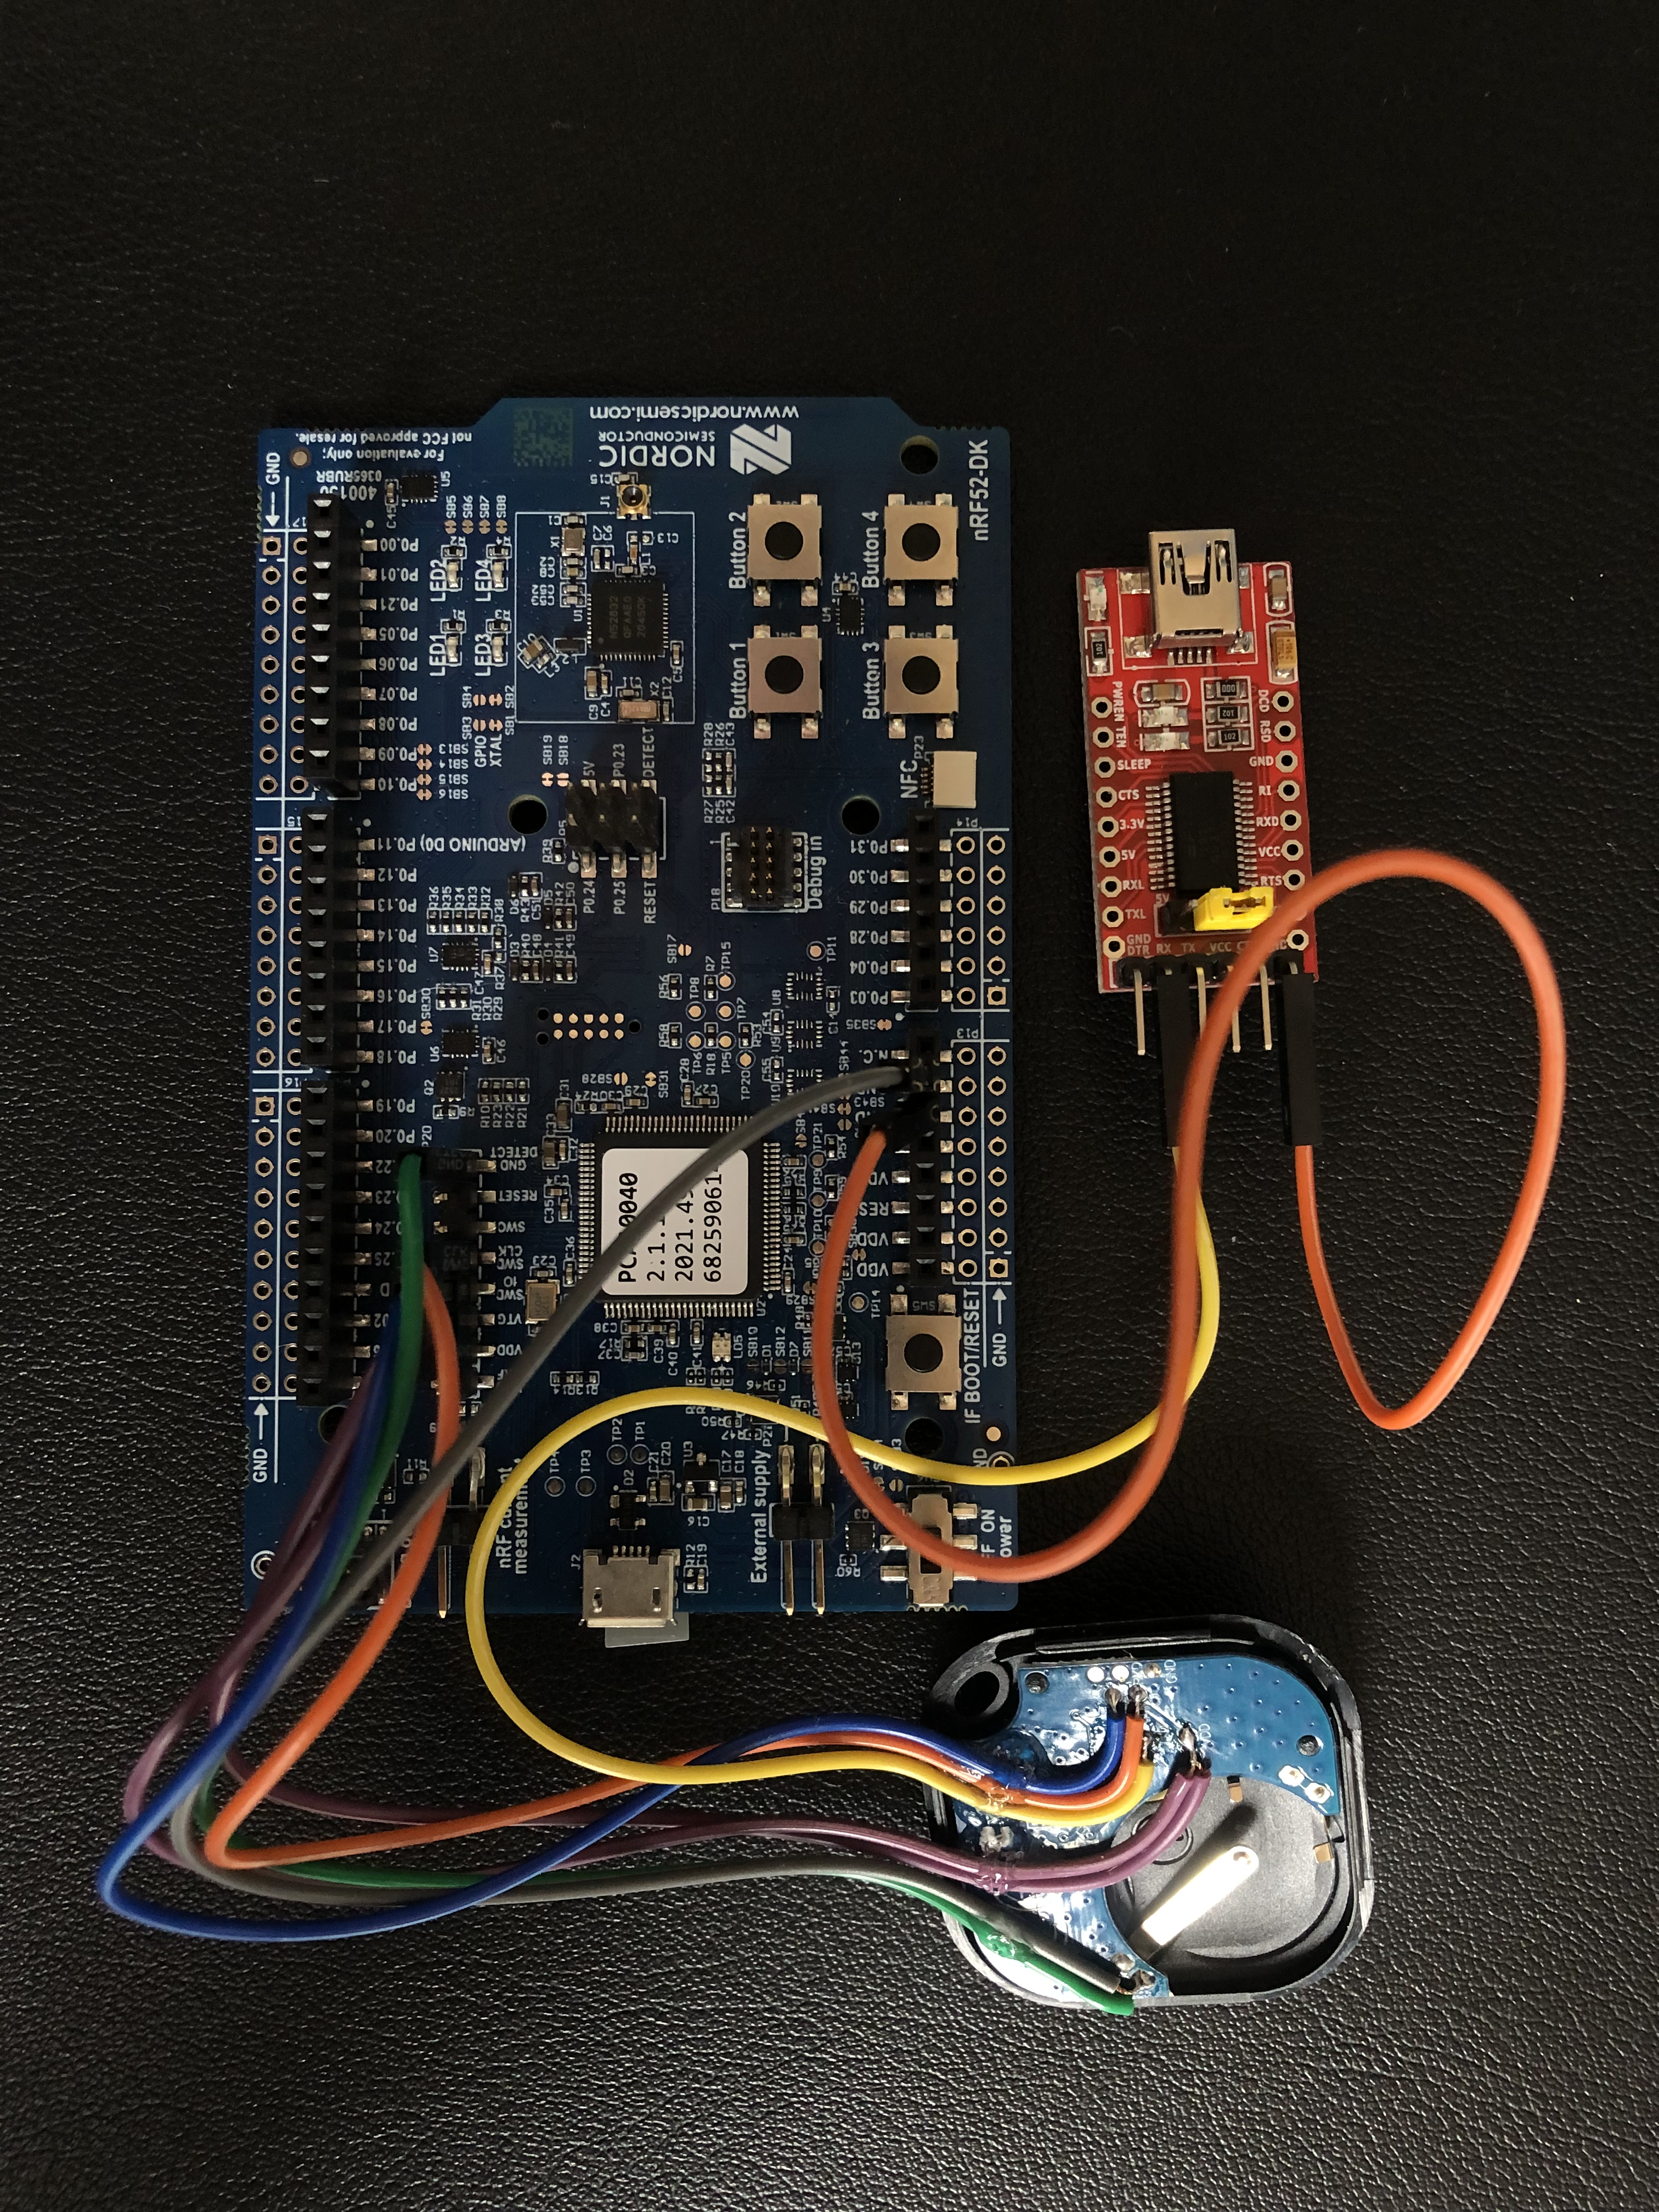
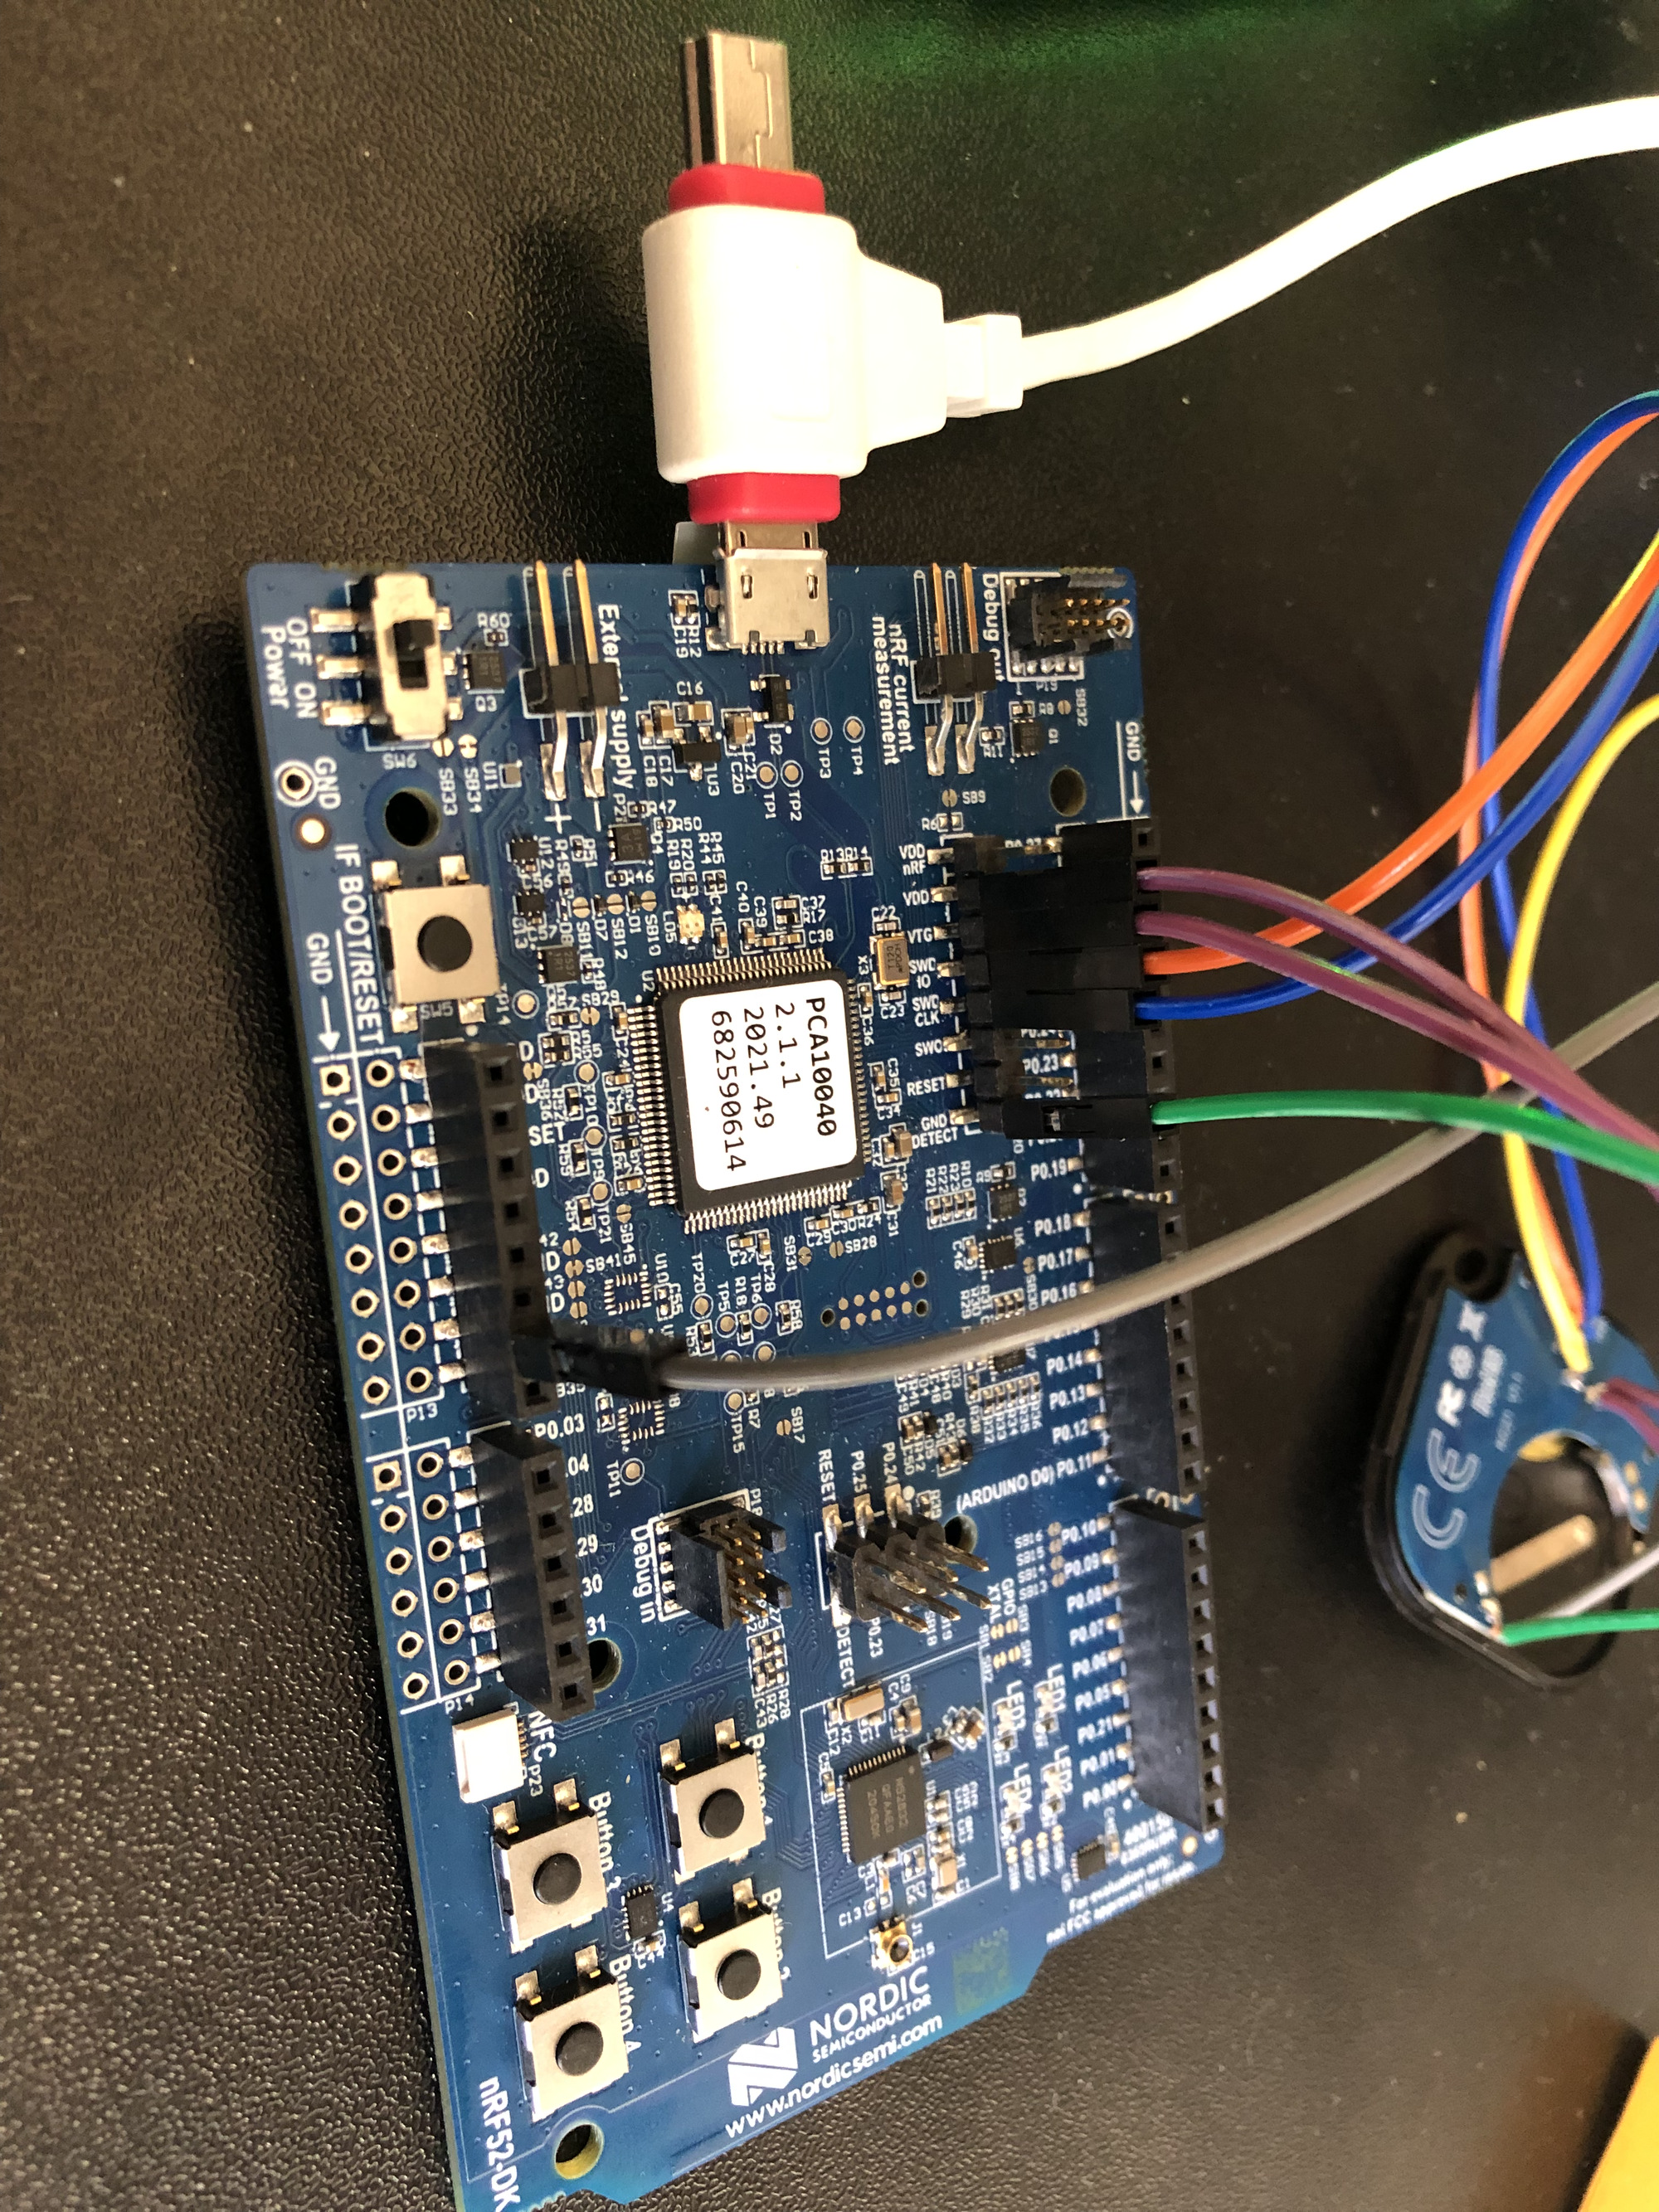
Here's the connections from the device to the dev kit and USB to Serial converter:
Flashing the Bluecharm Beacon with Zephyr RTOS
Now that the device is wired up, we try to program the target in our Zephyr environment. There's a post on how to set up Zephyr over here.
To validate our wiring, let's try to flash Nordic's peripheralLBS sample with the minimal footprint enabled (memory on this SoC is quite limited). The DCONF_FILE flag sets the configuration file for this build.
Change directory into the peripheral_lbs directory and run the following commands:
west build -b nrf52dk_nrf52805 -p auto -- -DCONF_FILE="prj_minimal.conf"
west flash
If everything goes well you should see the following output:
Parsing image file.
WARNING: A programming operation has been performed without --verify.
WARNING: Programming can fail without error.
Enabling pin reset.
Applying pin reset.
Using a Bluetooth Debugging app such as LightBlue, we should now see a device named Nordic_LBS advertising.
However, connecting to it and pressing the button does nothing just yet. This is because we haven't defined the correct pins for our button, LED, buzzer, etc. Let's do that now.
Reverse engineering the peripheral pinout of the BLE Beacon
Looking at Nordic's documentation for the nrf52805, on page 349 there's a recommended layout for the SoC.
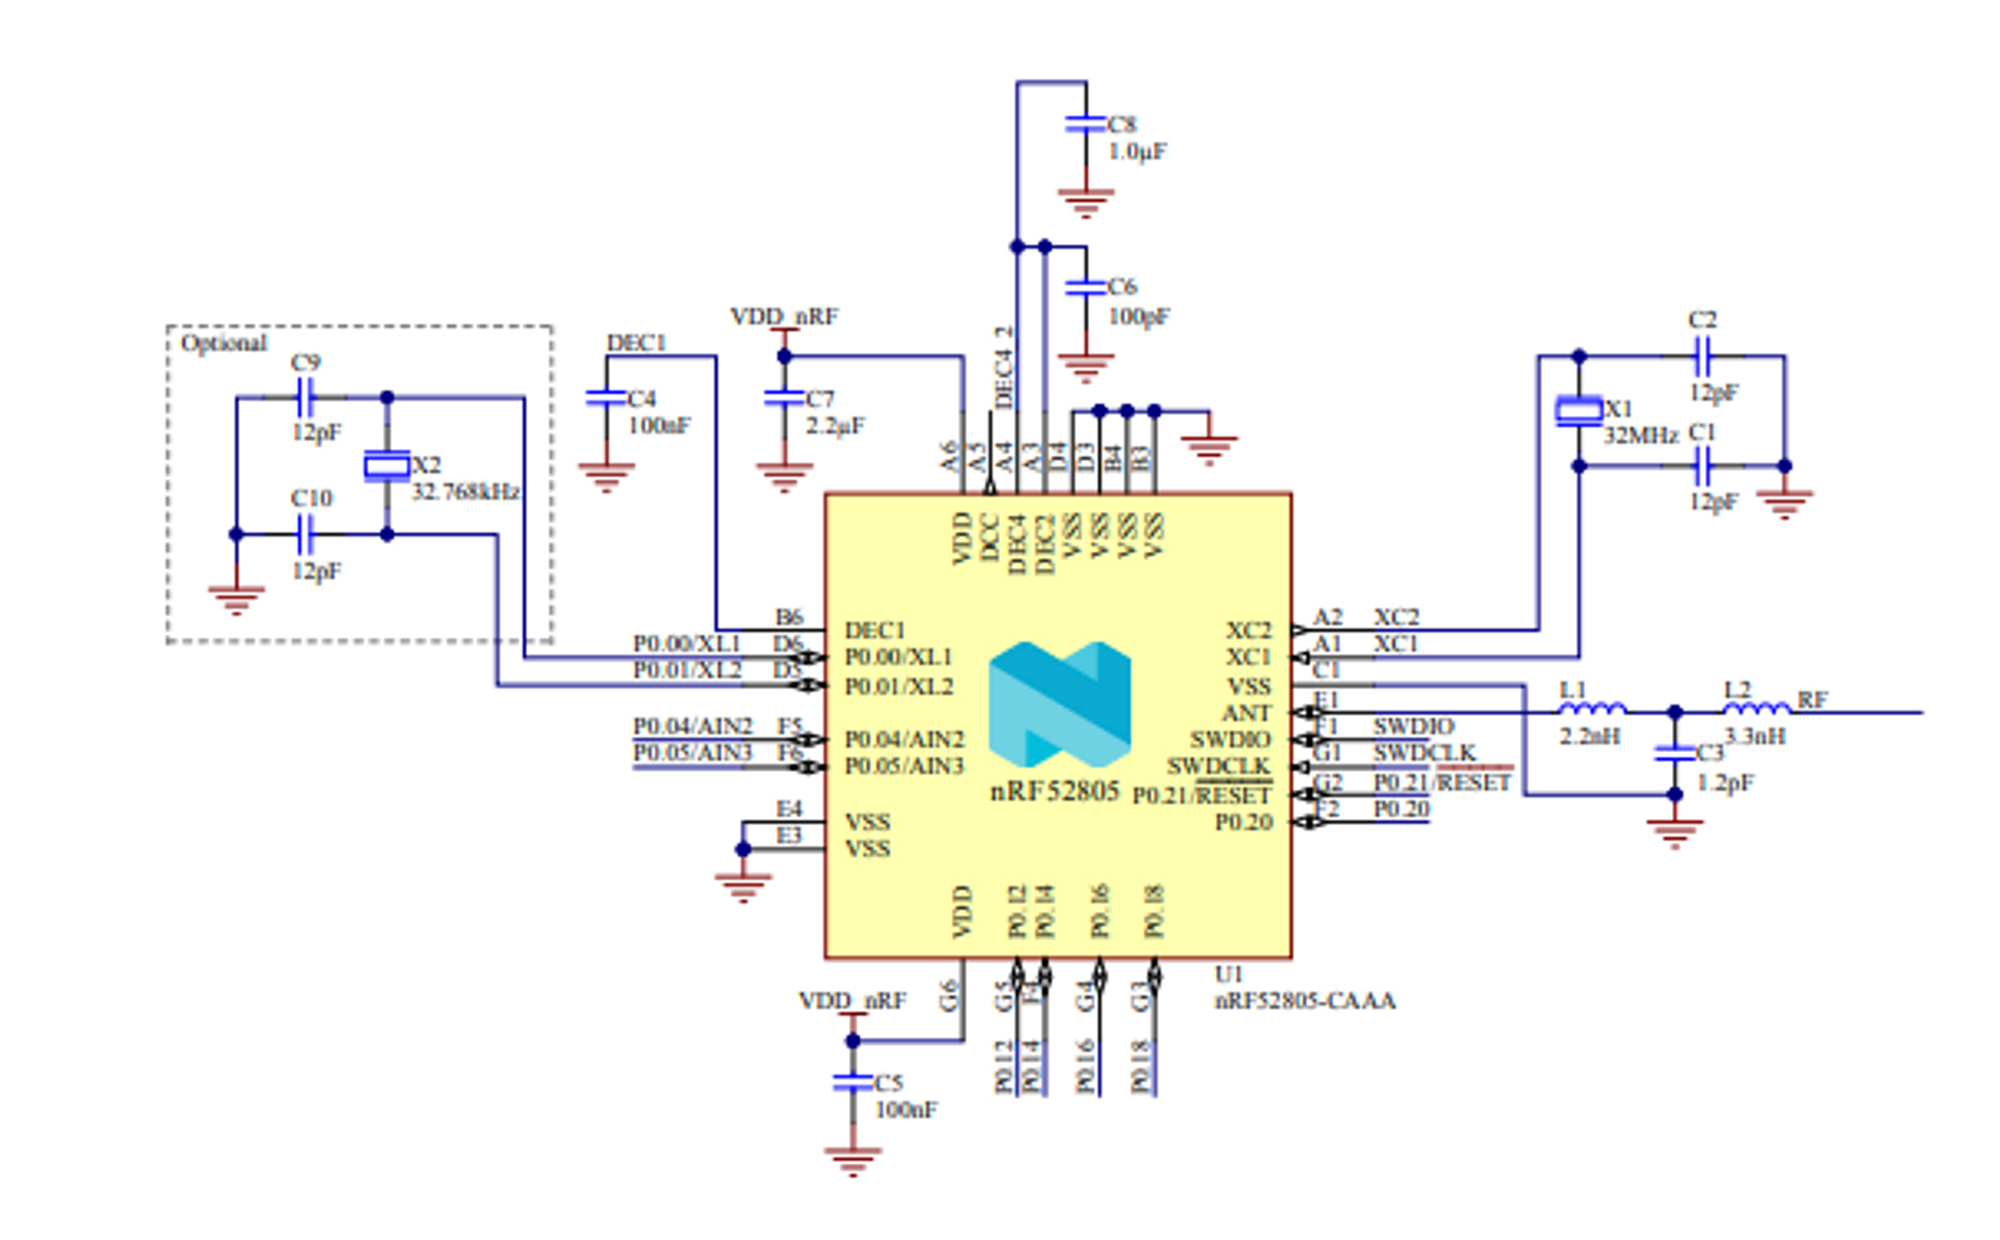
This is a helpful place to start when trying to guess which pins are connected with which peripherals on the Beacon's design.
Through a lot of trial and error, I was able to guess pin assignments for most of our BLE beacon's features. (The on-board accelerometer remains a mystery)
We need to make an overlay file in order to overwrite the default pins for the nrf52dk that we're building for.
Create a new folder named boards in the peripheral_lbs directory. In ./peripheral_lbs/boards add a new file named nrf52dk_nrf52805.overlay.
Paste the following code into the new overlay file:
&uart0 {
    tx-pin = < 0x5 >;
    rx-pin = < 0x8 >;
    rts-pin = < 0x6 >;
    cts-pin = < 0x7 >;
};

&led0 {
    gpios = < &gpio0 0x14 0x1 >;
};

&led1 {
    gpios = < &gpio0 0xc 0x1 >;
};

&button0 {
    gpios = < &gpio0 0x4 0x11 >;
};

/ {
    pwmbuzzers {
        compatible = "pwm-leds";
        pwm_buzzer: pwm_buzzer {
            pwms = <&sw_pwm 0xc>;
        };
    };
};

&sw_pwm {
    status = "okay";
    ppi-base = <11>;
    clock-prescaler = <8>;
};
Perform a new build & flash sequence. The compiler should pick up on the new overlay by itself, but if you're having trouble you can always delete the build folder and force it to regenerate.
west build -b nrf52dk_nrf52805 -p auto -- -DCONF_FILE="prj_minimal.conf"
west flash
Finally, test the sample!
(1) Open your BLE debugging app of choice. (2) Connect to the Nordic_LBS device. (3) Subscribe to the button characteristic. (4) Press the button on your Beacon device. (5) Watch the updates flow in.
Try connecting to it via web bluetooth for some cool applications.