Using the Waveshare SIM7600 4G RaspberryPi Hat and a Hologram SIM card
etting Waveshare’s SIM7600 4G Hat working with my Raspberry Pi as a main network interface so I thought I would outline the steps that ended up working for me.
First, I should mention that the Wiki for the Hat describes two methods of “dialing-up” via LTE: NDIS and PPPD . They note that NDIS is supposed to be faster than PPPD, however, that was not my experience. I found NDIS to be inconsistent compared to PPPD (it is quite possible I incorrectly configured NDIS on my side). Regardless, I will outline PPPD configuration steps I took.
You will need an active SIM from your provider, I am using Hologram. They have outlined the steps you will need to take to active you SIM here . Note that the SIM7600 Hat requires a full sized SIM card so be careful when removing your SIM from the carrier card that Hologram provides.
I will assume you have a Raspberry Pi configured with the latest release of Raspbian OS. I am continuing with the full desktop installation.
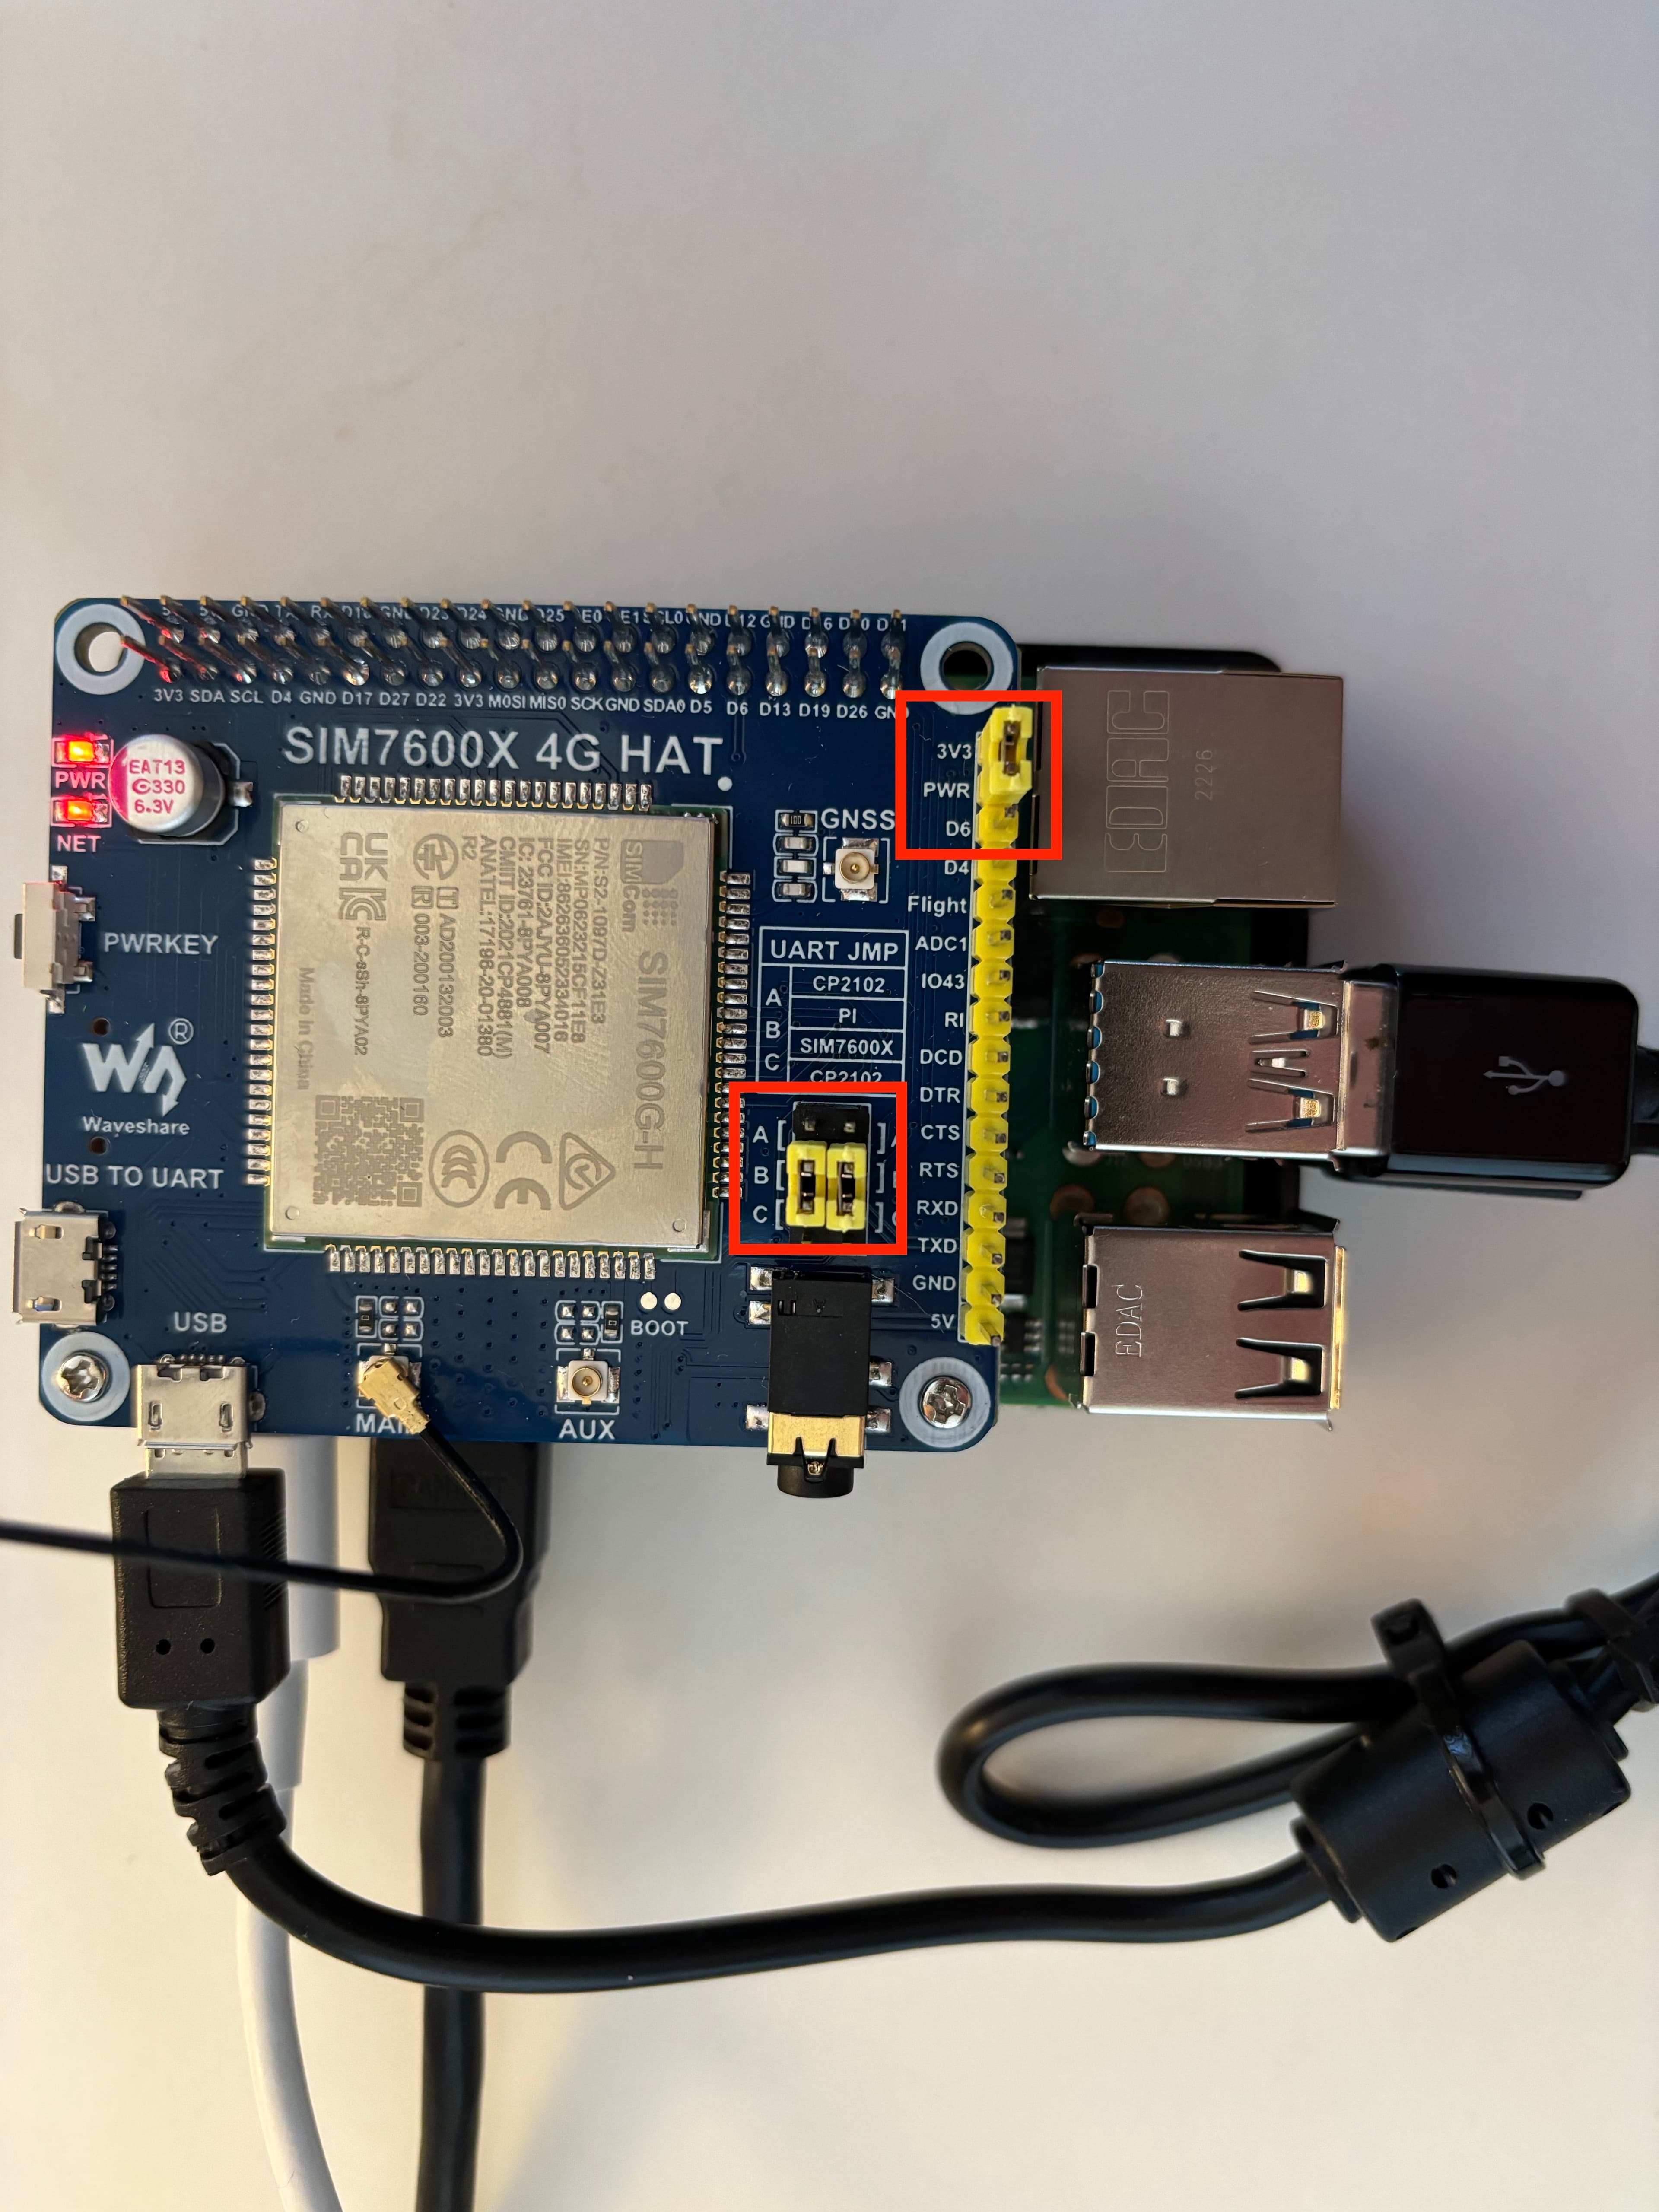
Connect the Hat to the top of the Raspberry Pi and plug the Micro USB cable into the Pi and the connecter on the Hat labeled: “USB” NOT the connector labeled “USB TO UART”. Plug the LTE antenna into the connector labeled “main”.

Make sure the middle two jumpers are set to the “B” configuration. Move the remaining jumper to connect 3V3 and PWR pins. This will enable the modem to automatically turn on when power is present. Otherwise you would need to write a start up script that pulls the PWR GPIO high.
On your Raspberry Pi you will need to configure serial port access to communicate with the LTE Hat. In a terminal window, type:
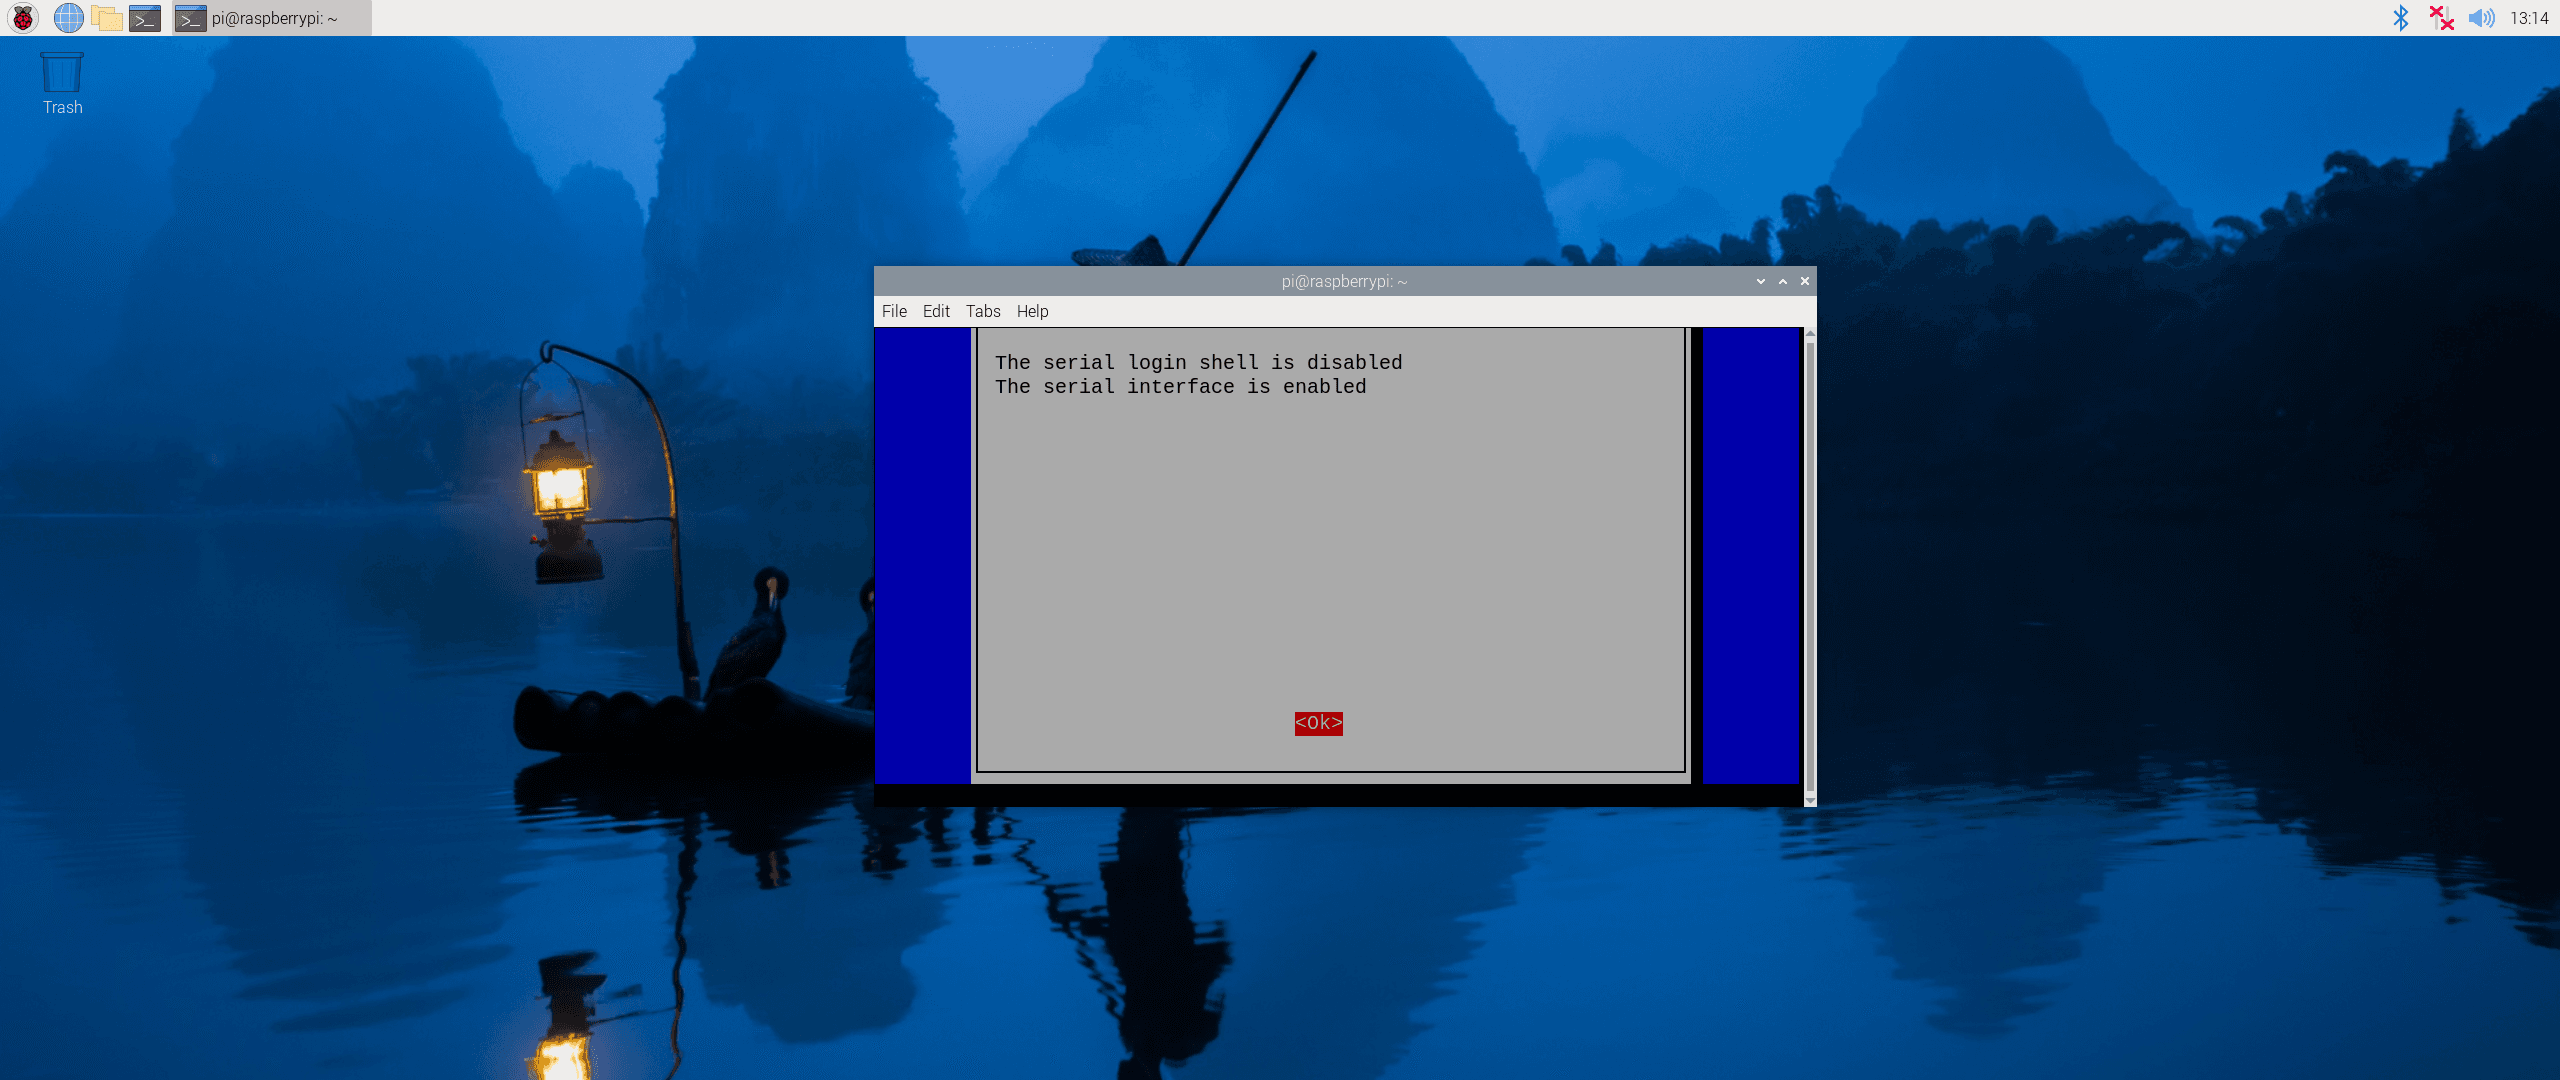
sudo raspi-configIn the Interfacing Options submenu find the Serial Port settings and press enter. Answer NO to “Would you like a login shell to be accessible over serial?” then answer YES to “Would you like the serial port hardware to be enabled?”.


Then you should reboot the Raspberry Pi.
Once rebooted, open your terminal again. Update your packages then install the minicom tool with the following commands:
sudo apt update
sudo apt install minicom -y
Run the following command to interface with the LTE modem’s shell:
minicom -D /dev/ttyUSB2When the minicom tool starts up, type the following to check the connection and make sure it echos responses back to you:
ATEOne by one, enter the following AT commands. Note that the ”#” denotes a comment and not a command to be entered.
# Force set 4G network
AT+CNMP=38
# Configure General Radio Packet Service (GRPS) and set Access Point Name (APN)
AT+CGDCONT=1,"IP","hologram"
# Check the network - this responds with the LTE signal strength
AT+CSQ
# Query network operators - you should see "hologram" somewhere in the response
AT+COPS?
You are done with the required AT commands so you can exit minicom by pressing Ctrl + A then Z then X and select Yes and press enter.
Now we will need to install the PPP dialer. Run the following command:
sudo apt install ppp -yEdit the provider file with the following command:
sudo nano /etc/ppp/peers/providerFind the section shown below by using the arrow keys to navigate around the file.
# MUST CHANGE: replace ******** with the phone number of your provider.
# The /etc/chatscripts/pap chat script may be modified to change the
# modem initialization string.
connect "/usr/sbin/chat -v -f /etc/chatscripts/pap -T ********"
Replace the connect line with the following:
connect "/usr/sbin/chat -s -v -f /etc/chatscripts/gprs -T hologram"Next, find the section shown below:
# Serial device to which the modem is connected.
/dev/modem
And replace the /dev/modem line with the following:
/dev/ttyUSB2Scroll to the bottom of the file and add the following lines:
nocrtscts
debug
nodetach
ipcp-accept-local
ipcp-accept-remote
Press Ctrl + O then Enter to save the file. Then press Ctrl + X to close the text editor.
Turn off your network access by clicking the WiFi symbol in the upper right corner and choosing Turn Off Wireless LAN. Run the following command to ensure you are not connected to any networks:
ping www.google.com -c 5You should see a 100% packet loss after this completes.
Finally, let’s turn on the LTE connection. In your terminal, choose File > New Tab and enter the following commands:
sudo killall ModemManager
sudo pon
Then, in a new terminal tab run:
sudo route add -net "0.0.0.0" ppp0Wait a few seconds. Then, back in your original terminal tab try ping’ing Google again:
ping www.google.com -c 5It should now return successful pings over LTE!
Each time you reboot your Pi, you will need to run these two commands again to start the connection back up:
sudo killall ModemManager
sudo pon