Abusing MQTT by streaming video with ESP32CAM
Jun, 07 2023
While MQTT is probably not the best technology for streaming video, let's try it anyway.
I'm starting with the ES32-CAM-MB configured to run with an external antenna to improve connection strength.
This post is a great resource on how to set up an external antenna on this ESP32 module.
Setting up our ESP32 with AWS IoT Core
We'll be using AWS IoT Core as an MQTT broker for this project. Their free tier is fairly generous, so this is a good place to start. Let's set up a new device.
First, start by creating a security policy for your device. I am naming my new policy: esp32_cam_policy.
Below is the policy I am using, but feel free to modify it if needed. You can read up on some policy examples here.
{
  "Version": "2012-10-17",
  "Statement": [
    {
      "Effect": "Allow",
      "Action": "iot:Connect",
      "Resource": "arn:aws:iot:us-east-1:334542936098:client/${iot:Connection.Thing.ThingName}"
    },
    {
      "Effect": "Allow",
      "Action": "iot:Subscribe",
      "Resource": "arn:aws:iot:us-east-1:334542936098:topicfilter/data/sub"
    },
    {
      "Effect": "Allow",
      "Action": "iot:Publish",
      "Resource": "arn:aws:iot:us-east-1:334542936098:topic/stream/pub"
    },
    {
      "Effect": "Allow",
      "Action": "iot:Receive",
      "Resource": "arn:aws:iot:us-east-1:334542936098:topic/data/sub"
    }
  ]
}
Below are the steps I took to create my new AWS IoT policy:
Next, we'll create a new thing which is how AWS IoT refers to our connected devices.
Let's name our thing esp32_cam. Attach our existing policy to our new thing and download the generated certificates. We'll need to reference these certificates in our ESP32 code.
Setting up our ESP32CAM with Arduino
Let's create a new Arduino project and configure it for your ES32CAM. Navigate to Arduino > Preferences and under the additional board manager URLs paste in the following line:
https://raw.githubusercontent.com/espressif/arduino-esp32/gh-pages/package_esp32_index.json
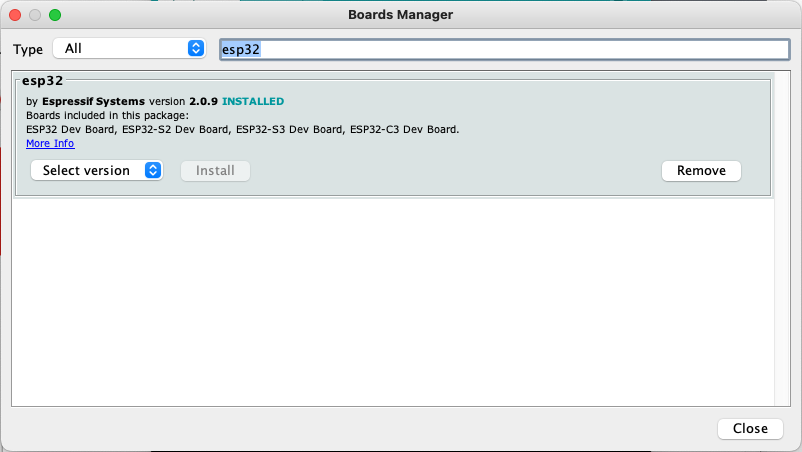
Next, go to Tools > Board > Board Manager and search for esp32 and install the package provided by Espressif Systems
Once the installation is complete, select your board by navigating to Tools > Board > ESP32 Arduino > AI Thinker ESP32-CAM.
Flashing the code
We're ready to flash our program. You can find the full code here.
In your .ino file paste in the following:
#include "secrets.h"
#include <WiFiClientSecure.h>
#include <MQTTClient.h>
#include "WiFi.h"
#include "esp_camera.h"

#define PWDN_GPIO_NUM     32
#define RESET_GPIO_NUM    -1
#define XCLK_GPIO_NUM      0
#define SIOD_GPIO_NUM     26
#define SIOC_GPIO_NUM     27
#define Y9_GPIO_NUM       35
#define Y8_GPIO_NUM       34
#define Y7_GPIO_NUM       39
#define Y6_GPIO_NUM       36
#define Y5_GPIO_NUM       21
#define Y4_GPIO_NUM       19
#define Y3_GPIO_NUM       18
#define Y2_GPIO_NUM        5
#define VSYNC_GPIO_NUM    25
#define HREF_GPIO_NUM     23
#define PCLK_GPIO_NUM     22

#define ESP32CAM_PUBLISH_TOPIC   "stream/pub"

const int bufferSize = 1024 * 23; // 23552 bytes

WiFiClientSecure net = WiFiClientSecure();
MQTTClient client = MQTTClient(bufferSize);

void messageReceived(char *topic, byte *payload, unsigned int length)
{
  Serial.print("Received [");
  Serial.print(topic);
  Serial.print("]: ");
  for (int i = 0; i < length; i++)
  {
    Serial.print((char)payload[i]);
  }
  Serial.println();
}


void connectAWS()
{
  WiFi.mode(WIFI_STA);
  WiFi.begin(WIFI_SSID, WIFI_PASSWORD);

  Serial.println("\n\n=====================");
  Serial.println("Connecting to Wi-Fi");
  Serial.println("=====================\n\n");

  while (WiFi.status() != WL_CONNECTED) {
    delay(500);
    Serial.print(".");
  }

  // Configure WiFiClientSecure to use the AWS IoT device credentials
  net.setCACert(AWS_CERT_CA);
  net.setCertificate(AWS_CERT_CRT);
  net.setPrivateKey(AWS_CERT_PRIVATE);

  // Connect to the MQTT broker on the AWS endpoint we defined earlier
  client.begin(AWS_IOT_ENDPOINT, 8883, net);
  client.setCleanSession(true);

  Serial.println("\n\n=====================");
  Serial.println("Connecting to AWS IOT");
  Serial.println("=====================\n\n");

  while (!client.connect(THINGNAME)) {
    Serial.print(".");
    delay(100);
  }

  if (!client.connected()) {
    Serial.println("AWS IoT Timeout!");
    ESP.restart();
    return;
  }

  Serial.println("\n\n=====================");
  Serial.println("AWS IoT Connected!");
  Serial.println("=====================\n\n");
}

void cameraInit() {
  camera_config_t config;
  config.ledc_channel = LEDC_CHANNEL_0;
  config.ledc_timer = LEDC_TIMER_0;
  config.pin_d0 = Y2_GPIO_NUM;
  config.pin_d1 = Y3_GPIO_NUM;
  config.pin_d2 = Y4_GPIO_NUM;
  config.pin_d3 = Y5_GPIO_NUM;
  config.pin_d4 = Y6_GPIO_NUM;
  config.pin_d5 = Y7_GPIO_NUM;
  config.pin_d6 = Y8_GPIO_NUM;
  config.pin_d7 = Y9_GPIO_NUM;
  config.pin_xclk = XCLK_GPIO_NUM;
  config.pin_pclk = PCLK_GPIO_NUM;
  config.pin_vsync = VSYNC_GPIO_NUM;
  config.pin_href = HREF_GPIO_NUM;
  config.pin_sscb_sda = SIOD_GPIO_NUM;
  config.pin_sscb_scl = SIOC_GPIO_NUM;
  config.pin_pwdn = PWDN_GPIO_NUM;
  config.pin_reset = RESET_GPIO_NUM;
  config.xclk_freq_hz = 20000000;
  config.pixel_format = PIXFORMAT_JPEG;
  config.frame_size = FRAMESIZE_VGA;
  config.jpeg_quality = 10;
  config.fb_count = 2;
  config.grab_mode = CAMERA_GRAB_LATEST;

  // camera init
  esp_err_t err = esp_camera_init(&config);
  if (err != ESP_OK) {
    Serial.printf("Camera init failed with error 0x%x", err);
    ESP.restart();
    return;
  }
}

void grabImage() {
  camera_fb_t * fb = esp_camera_fb_get();
  if (fb != NULL && fb->format == PIXFORMAT_JPEG && fb->len < bufferSize) {
    Serial.print("Image Length: ");
    Serial.print(fb->len);
    Serial.print("\t Publish Image: ");
    bool result = client.publish(ESP32CAM_PUBLISH_TOPIC, (const char*)fb->buf, fb->len);
    Serial.println(result);

    if (!result) {
      ESP.restart();
    }
  }
  esp_camera_fb_return(fb);
  delay(1);
}

void setup() {
  Serial.begin(115200);
  cameraInit();
  connectAWS();
}

void loop() {
  client.loop();
  if (client.connected()) {
    grabImage();
  } else {
    Serial.println("Client disconnected!");
    delay(2000);
    ESP.restart();
  }
}
Next, we need to create a secrets.h to hold our WiFi credentials and our AWS certificates that we downloaded in the previous step.
The secrets.h skeleton is below as well as in the Github repository:
#include <pgmspace.h>

#define SECRET
#define THINGNAME "esp32_cam"

const char WIFI_SSID[] = "";
const char WIFI_PASSWORD[] = "";
const char AWS_IOT_ENDPOINT[] = "";

// Amazon Root CA 1
static const char AWS_CERT_CA[] PROGMEM = R"EOF(
-----BEGIN CERTIFICATE-----
-----END CERTIFICATE-----
)EOF";

// Device Certificate
static const char AWS_CERT_CRT[] PROGMEM = R"KEY(
-----BEGIN CERTIFICATE-----
-----END CERTIFICATE-----
)KEY";

// Device Private Key
static const char AWS_CERT_PRIVATE[] PROGMEM = R"KEY(
-----BEGIN RSA PRIVATE KEY-----
-----END RSA PRIVATE KEY-----
)KEY";
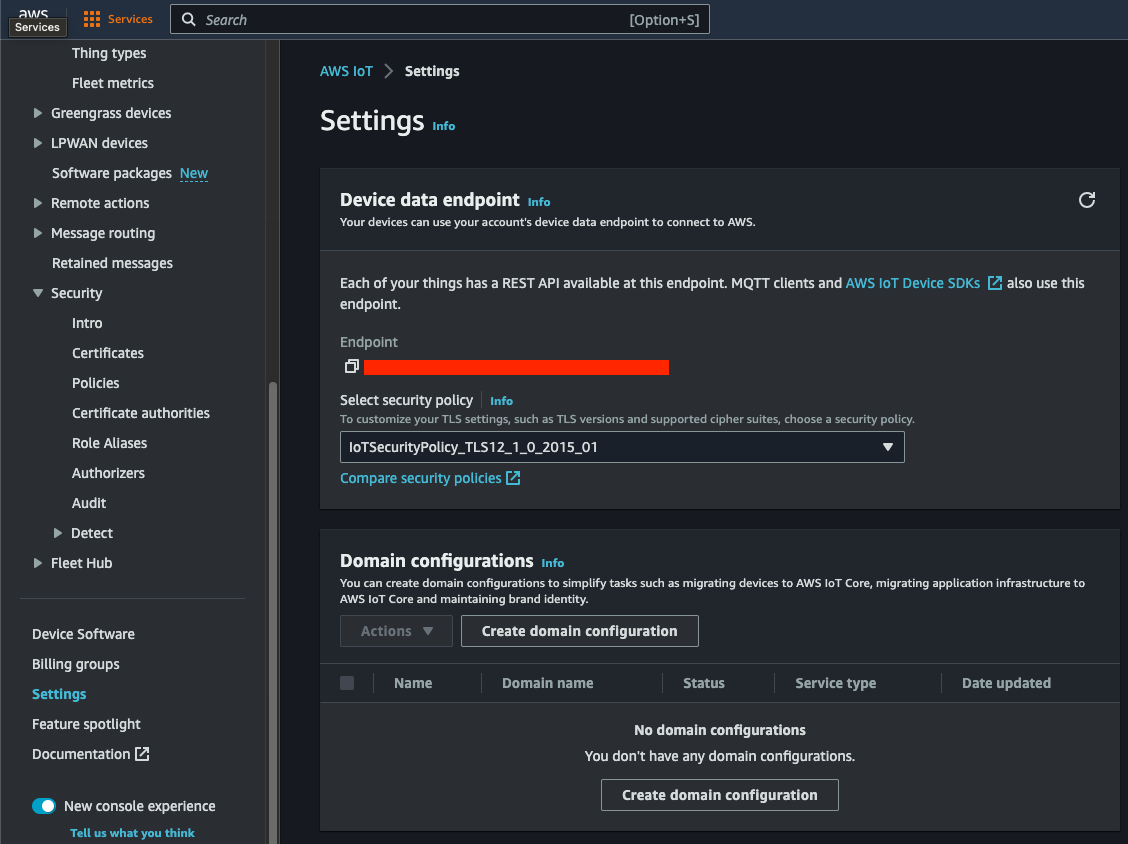
Replace the WIFI_SSID[] and WIFI_PASSWORD[] variables with your network credentials. Your AWS_IOT_ENDPOINT[] can be found in the settings tab of your AWS IoT Core Console:
Now, update the keys from the certificate files you downloaded in the previous step.
AWS_CERT_CA[]corresponds to theAmazonRootCA1.pemfile.AWS_CERT_CRT[]corresponds to the<uuid>-certificate.pem.crtfile.AWS_CERT_PRIVATE[]corresponds to the<uuid>-private.pem.keyfile.
Finally, compile and flash your board! If everything goes well, opening the serial monitor should show the following:
=====================
Connecting to Wi-Fi
=====================


...............

=====================
Connecting to AWS IOT
=====================


.

=====================
AWS IoT Connected!
=====================


Image Length: 10894	 Publish Image: 1
Image Length: 10879	 Publish Image: 1
Image Length: 10887	 Publish Image: 1
Image Length: 10883	 Publish Image: 1
Image Length: 10909	 Publish Image: 1
Image Length: 10907	 Publish Image: 1
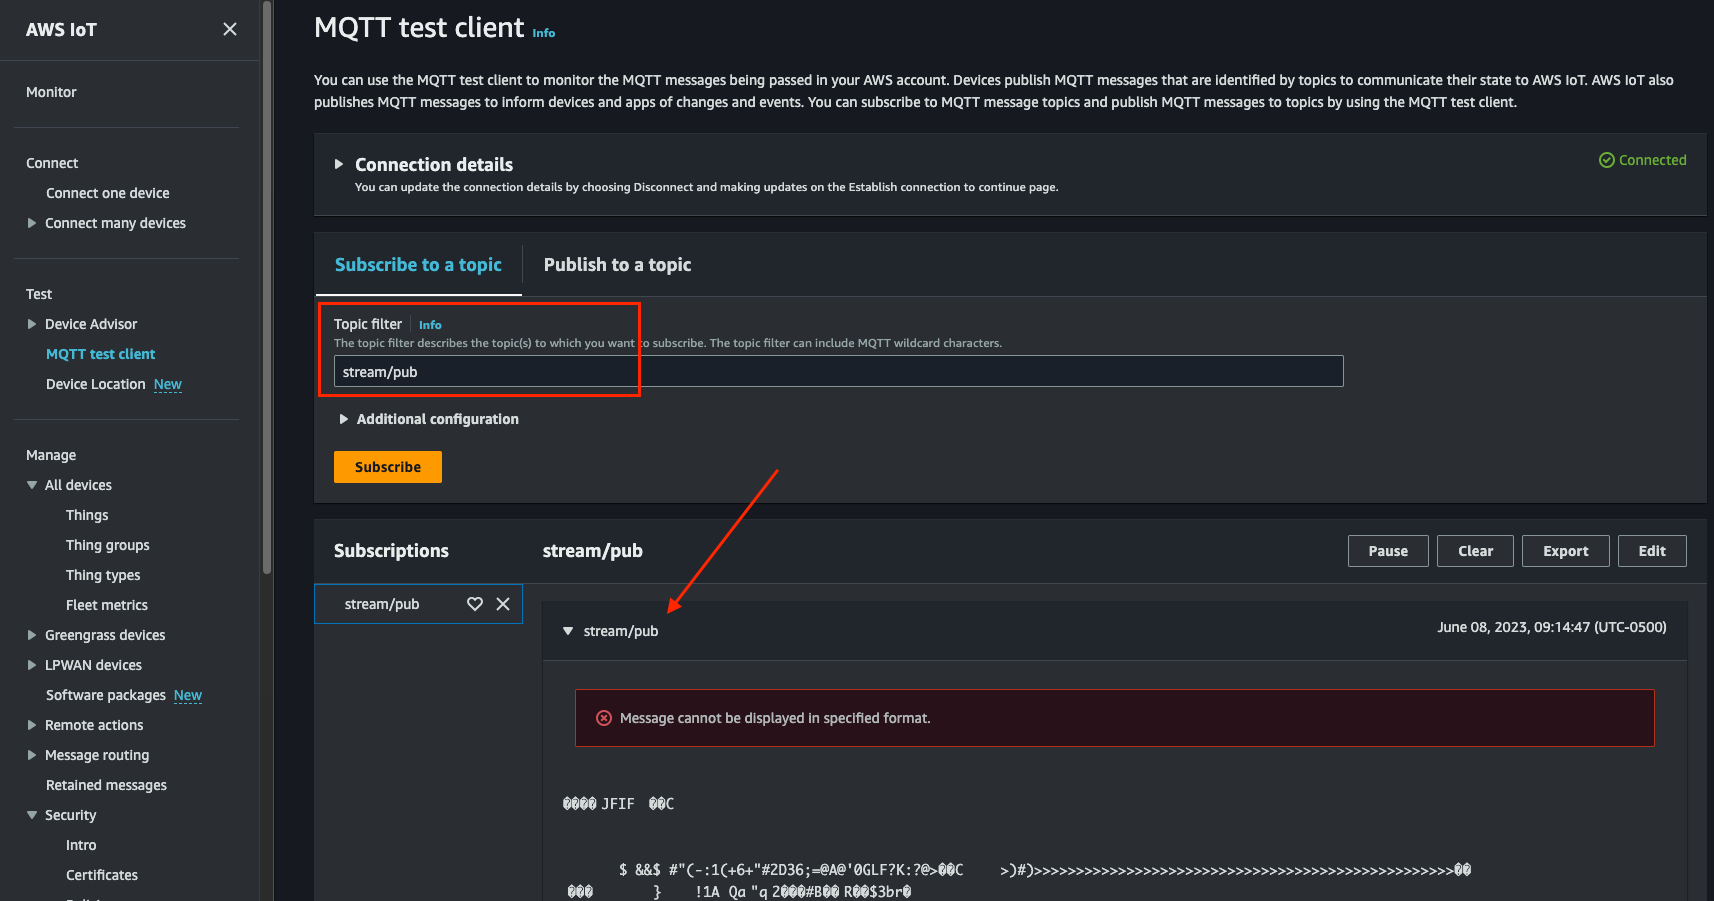
We can prove that the images are being streamed to the AWS IoT broker by using the MQTT test client and subscribing to our new topic:
Next, we have to wire up something to receive this video...