How to deploy a Typescript Parse Server on Elasticbeanstalk
May, 23 2022
Now that we have our Typescript Parse Server compiling and connecting to our MonoDB database, let's get it deployed to Elasticbeanstalk.
Download and install the Elasticbeanstalk CLI and the AWS CLI.
Run aws configure to sign in to your account with the CLI.
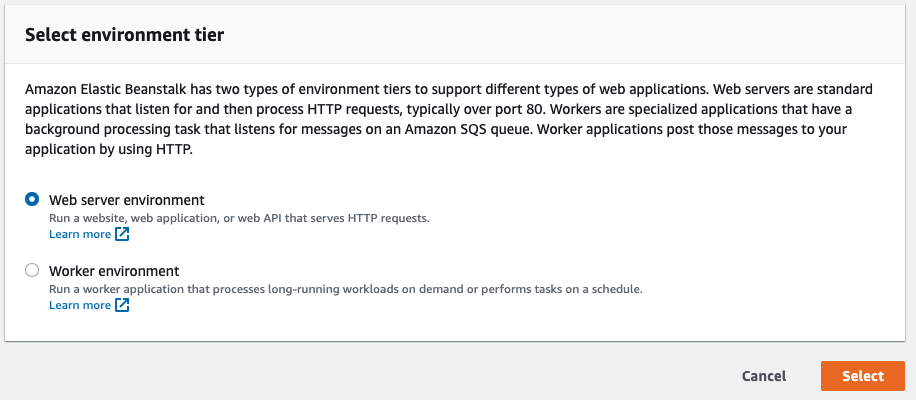
Log into AWS console and create a new elastic beanstalk instance.
Choose web server environment.
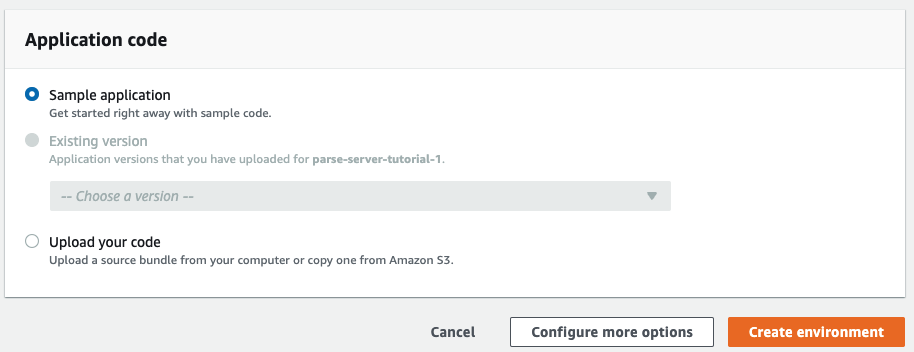
Give your new application a name:
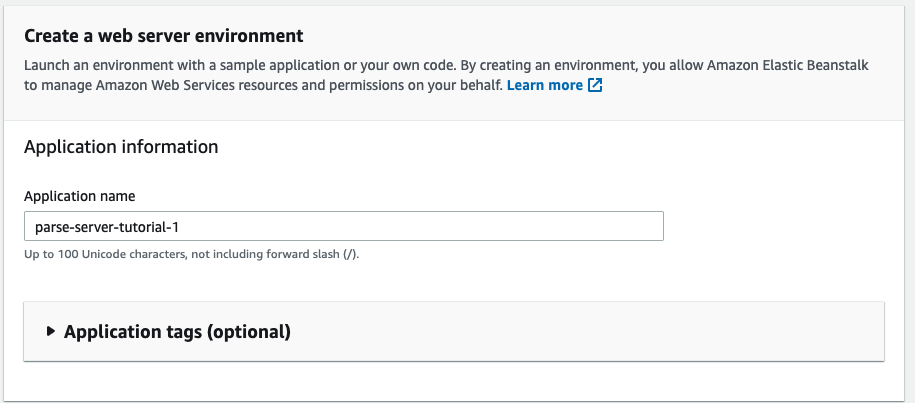
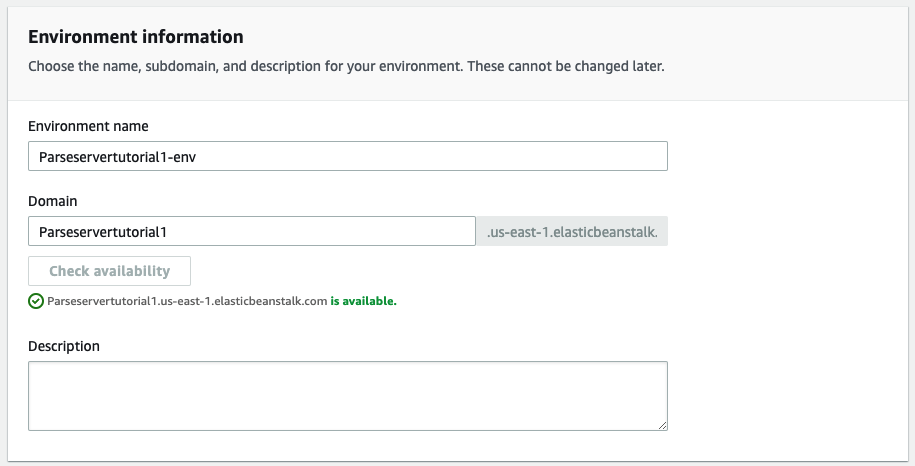
It is helpful here to choose a specific domain rather than letting it auto generate so that we can update our Parse config. Take note of the domain that you give your instance.
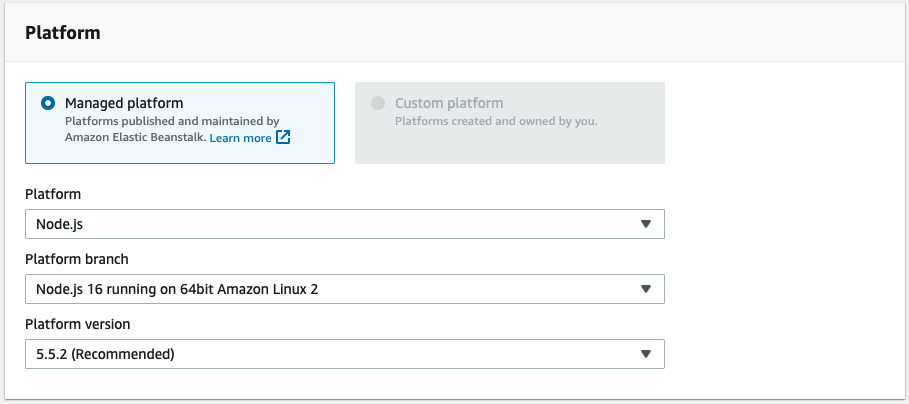
Choose a Node16 environment with the default settings:
Allow the instance to be created with a sample application and click create environment.
While your environment is deploying, navigate to ./.ebextensions/app.config of your Parse Server project and update the SERVER_URL property with the domain you specified.
For example:
SERVER_URL: "http://parseservertutorial1.us-east-1.elasticbeanstalk.com/parse"
The ./.ebextensions/app.config file contains all of the environment variables that our Elasticbeanstalk instance will be deployed with.
Here you can add the APP_ID and MASTER_KEY that you want to use for production.
Note that this file should not be checked into git to keep these keys secure.
We can also update the DATABASE_URI environment variable. You can then remove it from ./src/index.js so that we keep our connection string secure.
Configuring the Elasticbeanstalk Environment
After the sample code is deployed, we'll need to change the instance type to t2.small.
❗️ This is critical, otherwise the npm install command will fail on the server. t2.micro is too small of an instance for Parse Server.
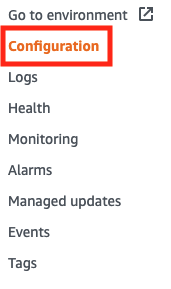
In the side panel of your Elasticbeanstalk console, choose the configuration option.
Scroll down until you find the capacity section and choose Edit.
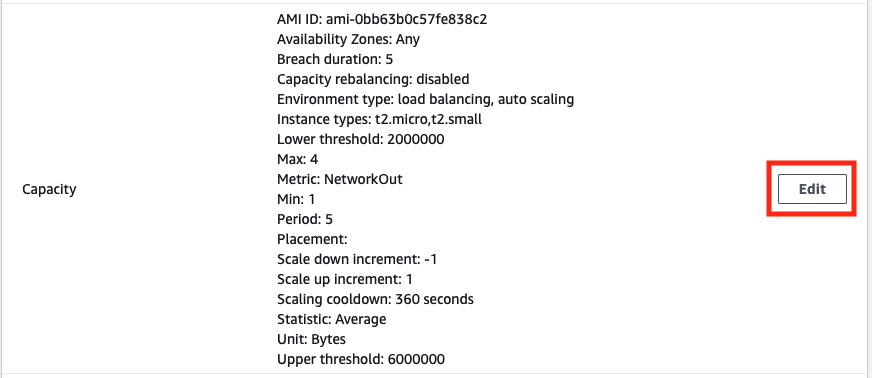
Find the 'instance types' section and remove t2.micro while keeping t2.small or larger.

Initialize our Parse Server as an Elasticbeanstalk instance
In the project's terminal run:
eb init
Answer the prompts by selecting the specified region and project name of our new instance when prompted.
Make sure to choose n when asked if you wish to continue with CodeCommit (assuming you are using Github).
Note that eb init will update our .gitignore file automatically for us.
Next, we need to make sure that our compiled javascript gets deployed and not our typescript.
In your root directory, create a new folder called ./scripts/
Add a file named ./scripts/dist.sh and fill it with the following shell command:
# If the directory, `dist`, doesn't exist, create `dist`
stat dist || mkdir dist
# Archive artifacts
zip dist/$npm_package_name.zip -r dist package.json package-lock.json .ebextensions
Next, move on over to your package.json file and add two new scripts:
    "dist": "sh ./scripts/dist.sh",
    "build": "tsc"
Test them out by first running npm run build and then running npm run dist.
You can confirm that everything is working by confirming there's a new .zip file in your ./dist folder.
Now we'll need to tell the Elasticbeanstalk CLI which zip to upload. Head on over to the ./elasticbeanstalk/config.yml file that was generated with the eb init command.
Add a new stage called deploy at the very bottom:
branch-defaults:
  master:
    environment: Parseservertutorial1-env
environment-defaults:
  Parseservertutorial1-env:
    branch: null
    repository: null
global:
  application_name: parse-server-tutorial-1
  default_ec2_keyname: null
  default_platform: Node.js 16 running on 64bit Amazon Linux 2
  default_region: us-east-1
  include_git_submodules: true
  instance_profile: null
  platform_name: null
  platform_version: null
  profile: null
  sc: git
  workspace_type: Application
# New!
# Replace the "parse-server-example" with the name of your zip file
deploy:
  artifact: dist/parse-server-example.zip
Let's try to deploy and cross our fingers.
But first make sure to commit your changes, otherwise the elasticbeanstalk CLI will not pick them up.
git add .
git commit -m "inital commit"
eb deploy
Once the deployment completes, you can test that your Parse Server is running as expected by running the following command:
curl --location --request POST 'http://<your domain here>/parse/functions/hello' \
--header 'X-Parse-Application-Id: <your app id here>' \
You should get a response from your ./cloud/functions.ts file with a body of: Hi.
Now you have your Typescript Parse Server running on your Elasticbeanstalk environment!
Remember to set up VPC peering to secure your database connection!