Configure a Google Nest with Homekit Using the homebridge-google-nest-sdm Plugin
Jan, 15 2024
I had some trouble setting up my Google Nest working with Homekit, so I thought it might be useful to document the steps that ended up working. This assumes you already have Homebridge correctly configured.
Get started by installing the homebridge-google-nest-sdm plugin. This was the only plugin I was able to get to work with my Nest Thermostat, I could not seem to get the other popular Google Nest plugin working. Note that the homebridge-google-nest-sdm plugin uses Google's SDM API which requires an upfront onetime cost of $5.
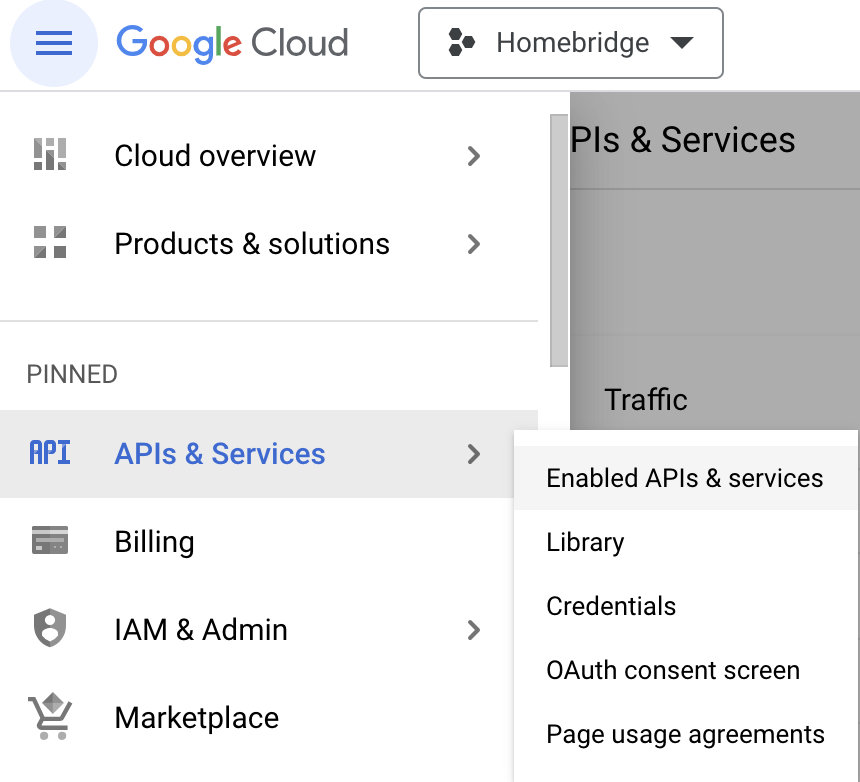
First, create a new Google Cloud Platform project here. You can call it whatever you like. Navigate to the APIs & Services > Enabled APIs & Services menu.
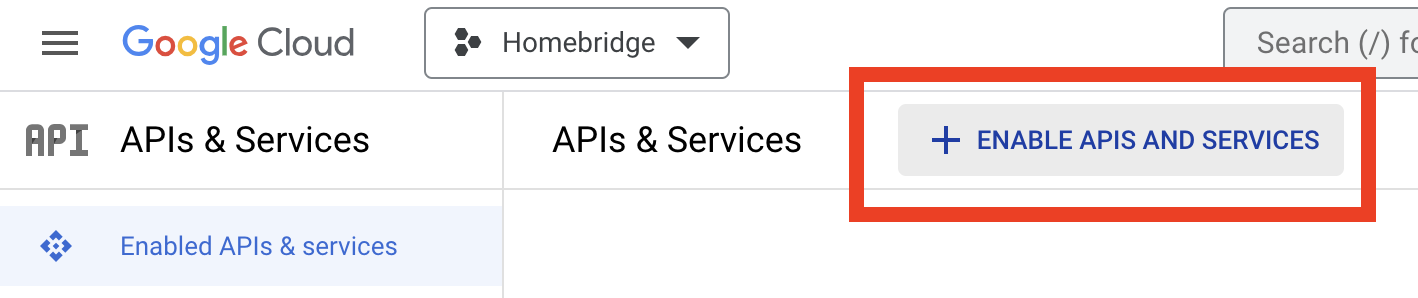
Choose Enable APIs and Services.
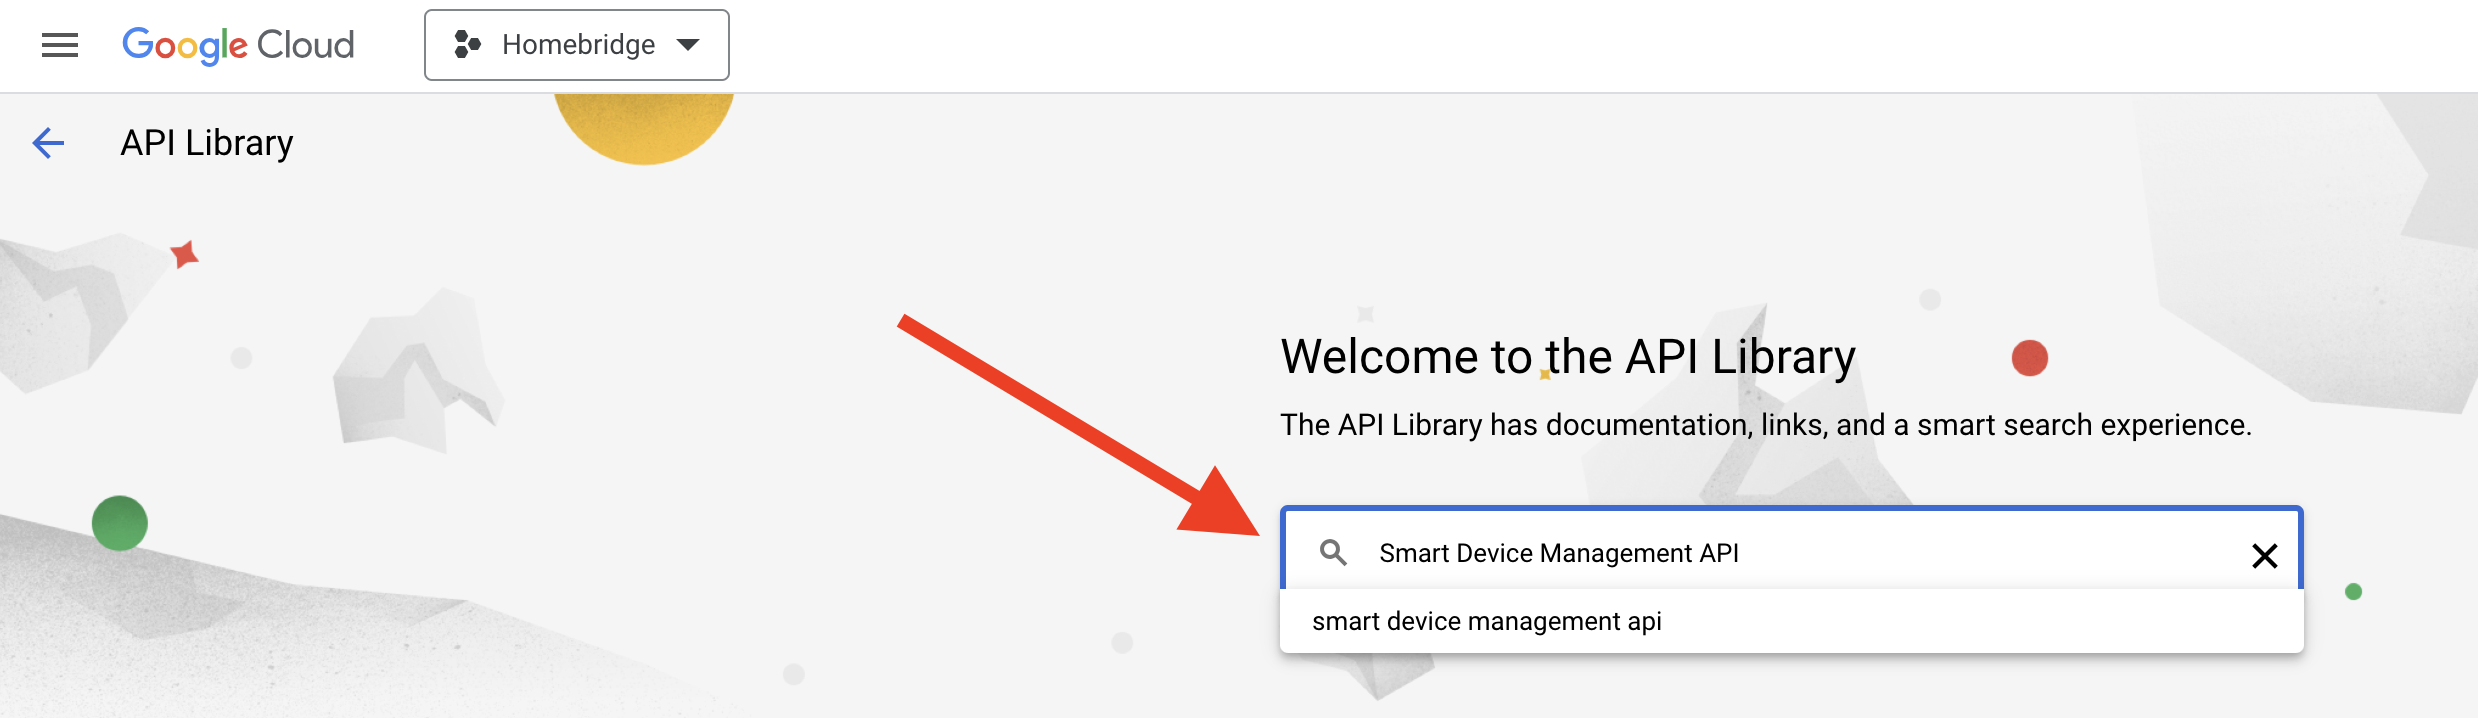
Search for the Smart Device Management API.
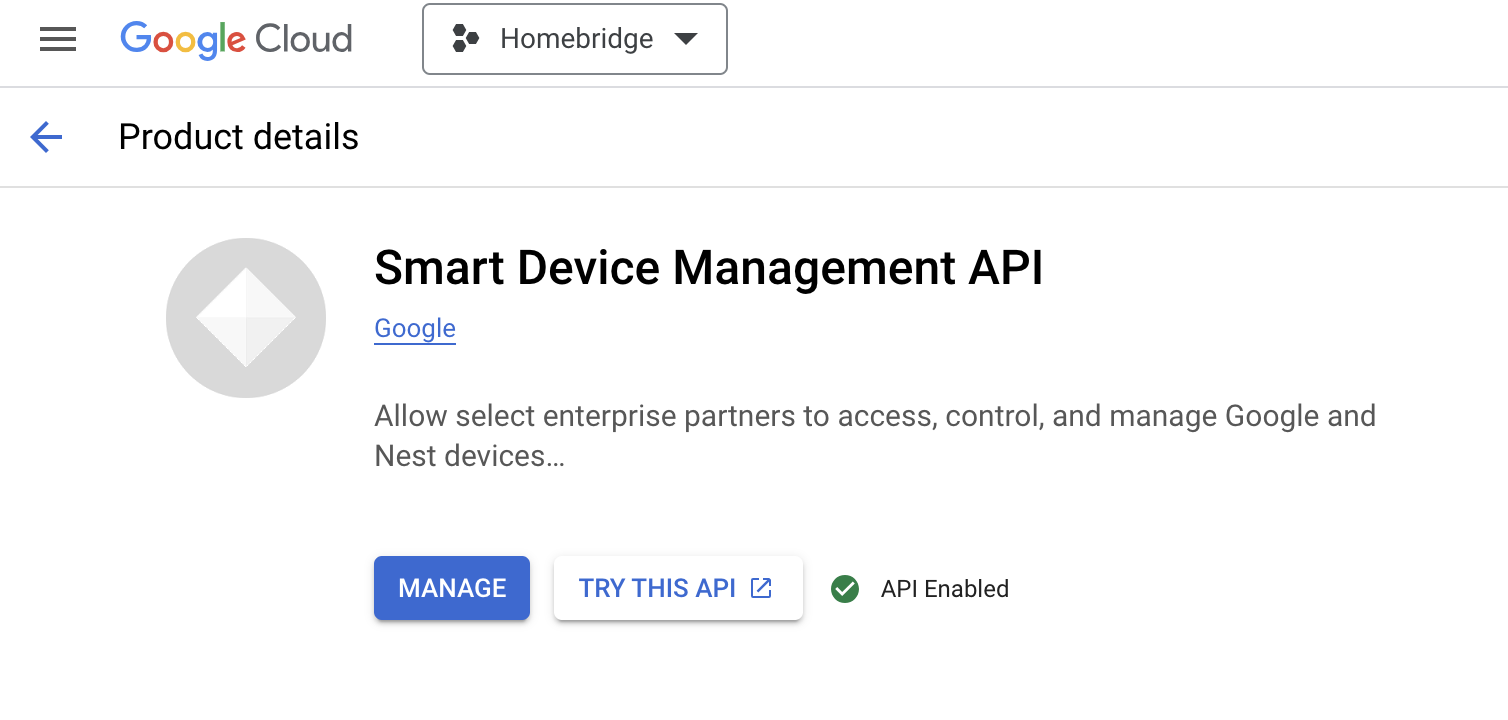
Enable this API.
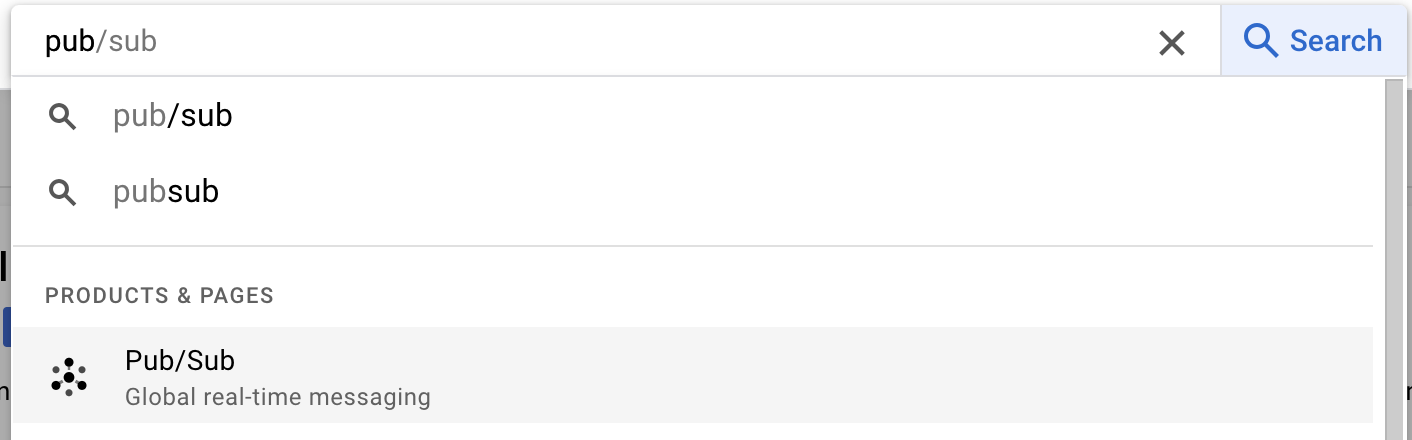
Search for the Pub/Sub API and enable it.
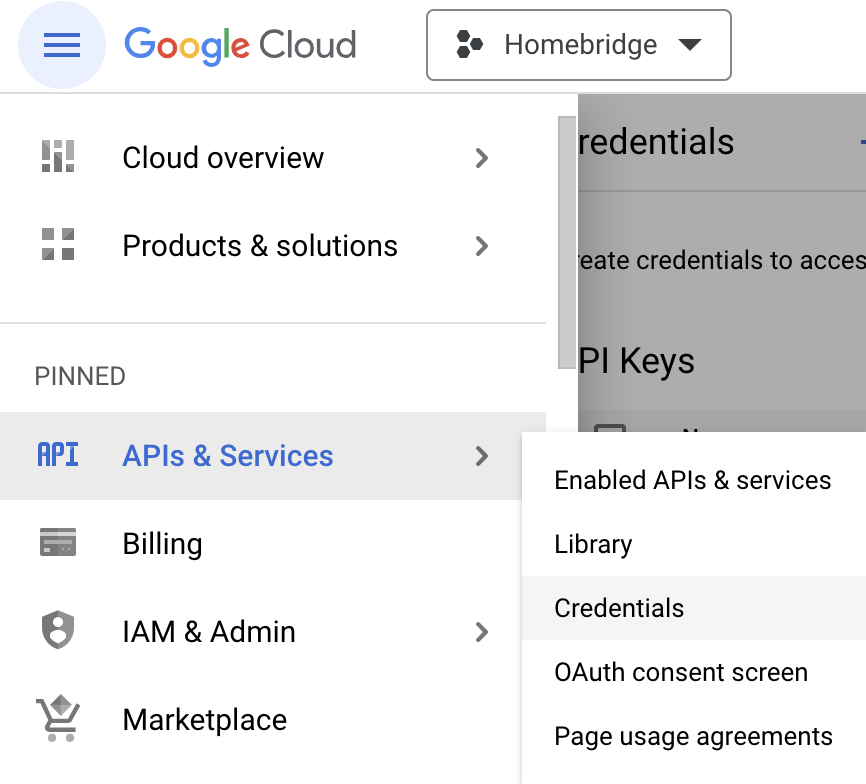
Next, go to APIs & Services > Credentials.
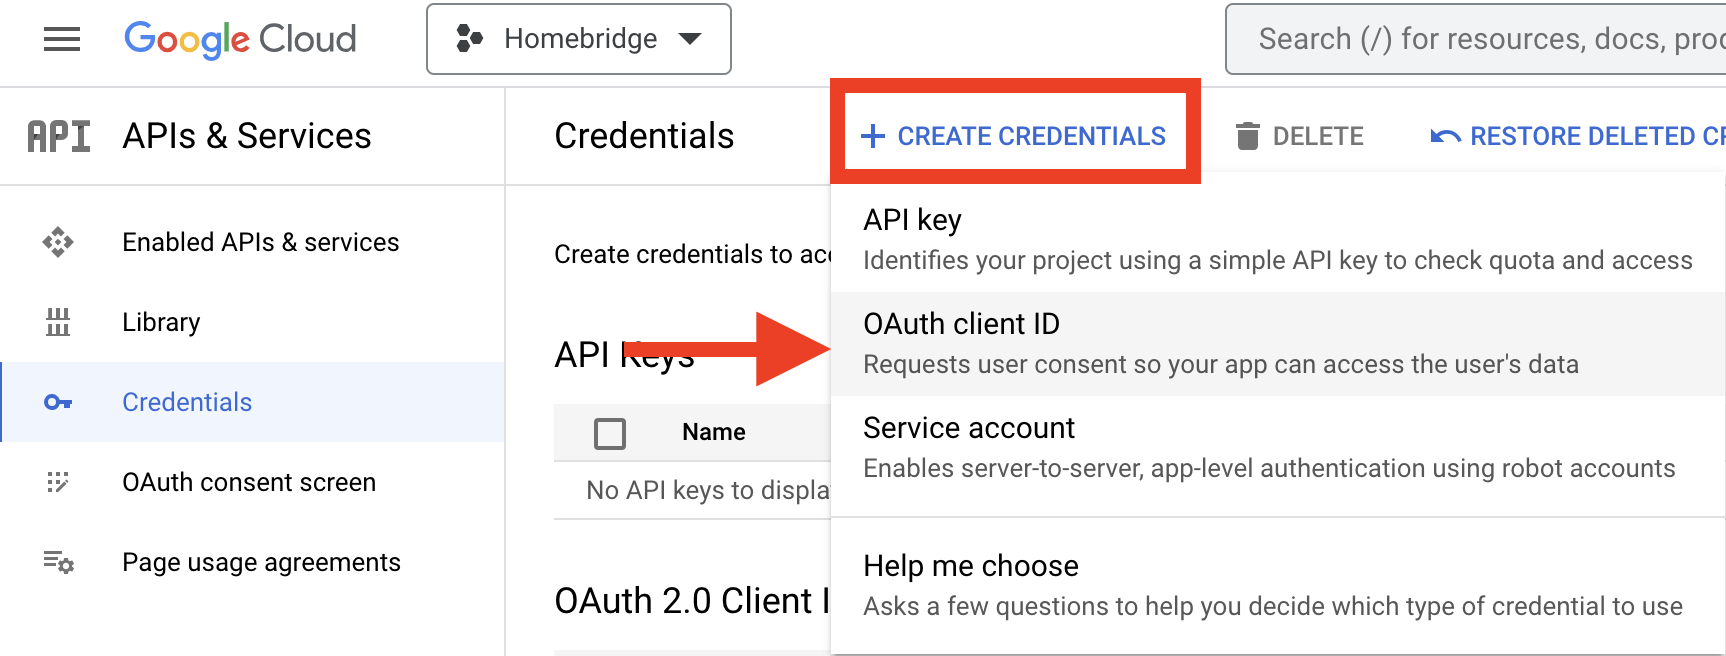
Choose Create Credentials > OAuth Client ID
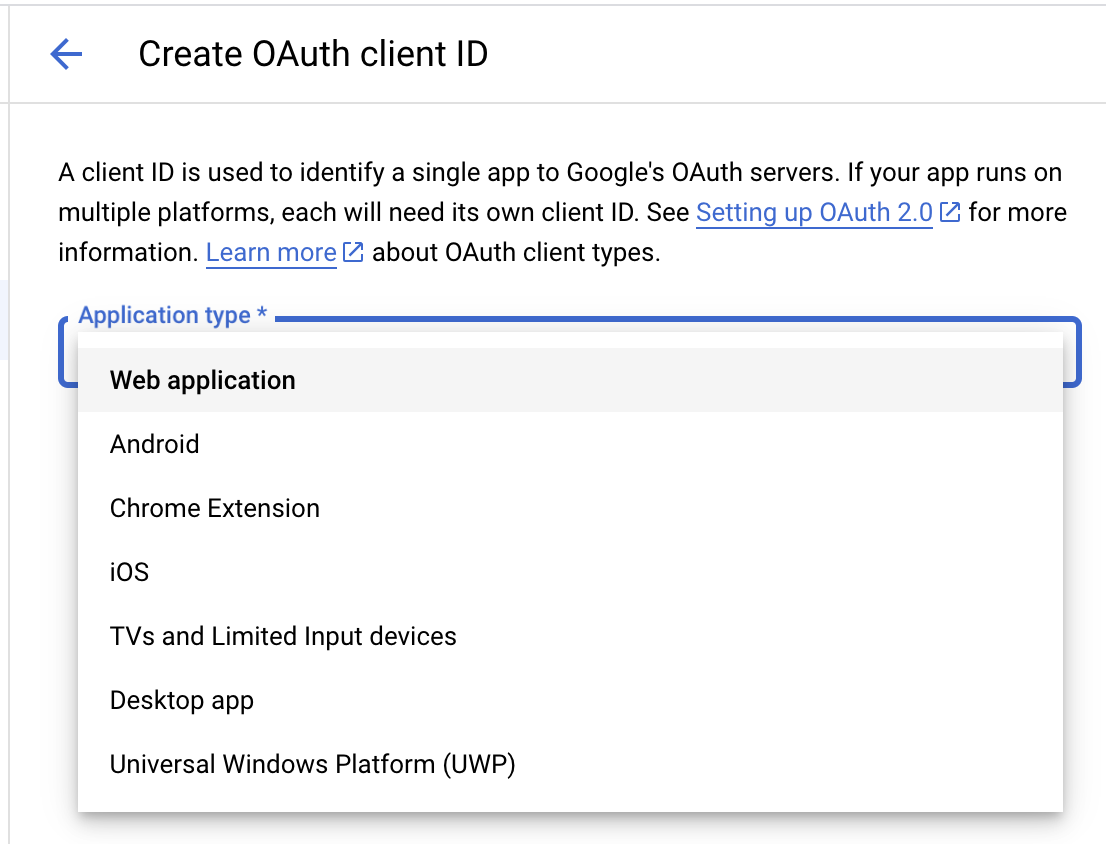
For application type, choose web application.
Give your credentials whatever name you like and add https://www.google.com to both the Authorized JavaScript origins and Authorized redirect URIs fields. Make sure you make note of the Client ID and Client Secret, you'll need this for your homebridge configuration. Paste this into your plugin's config now!
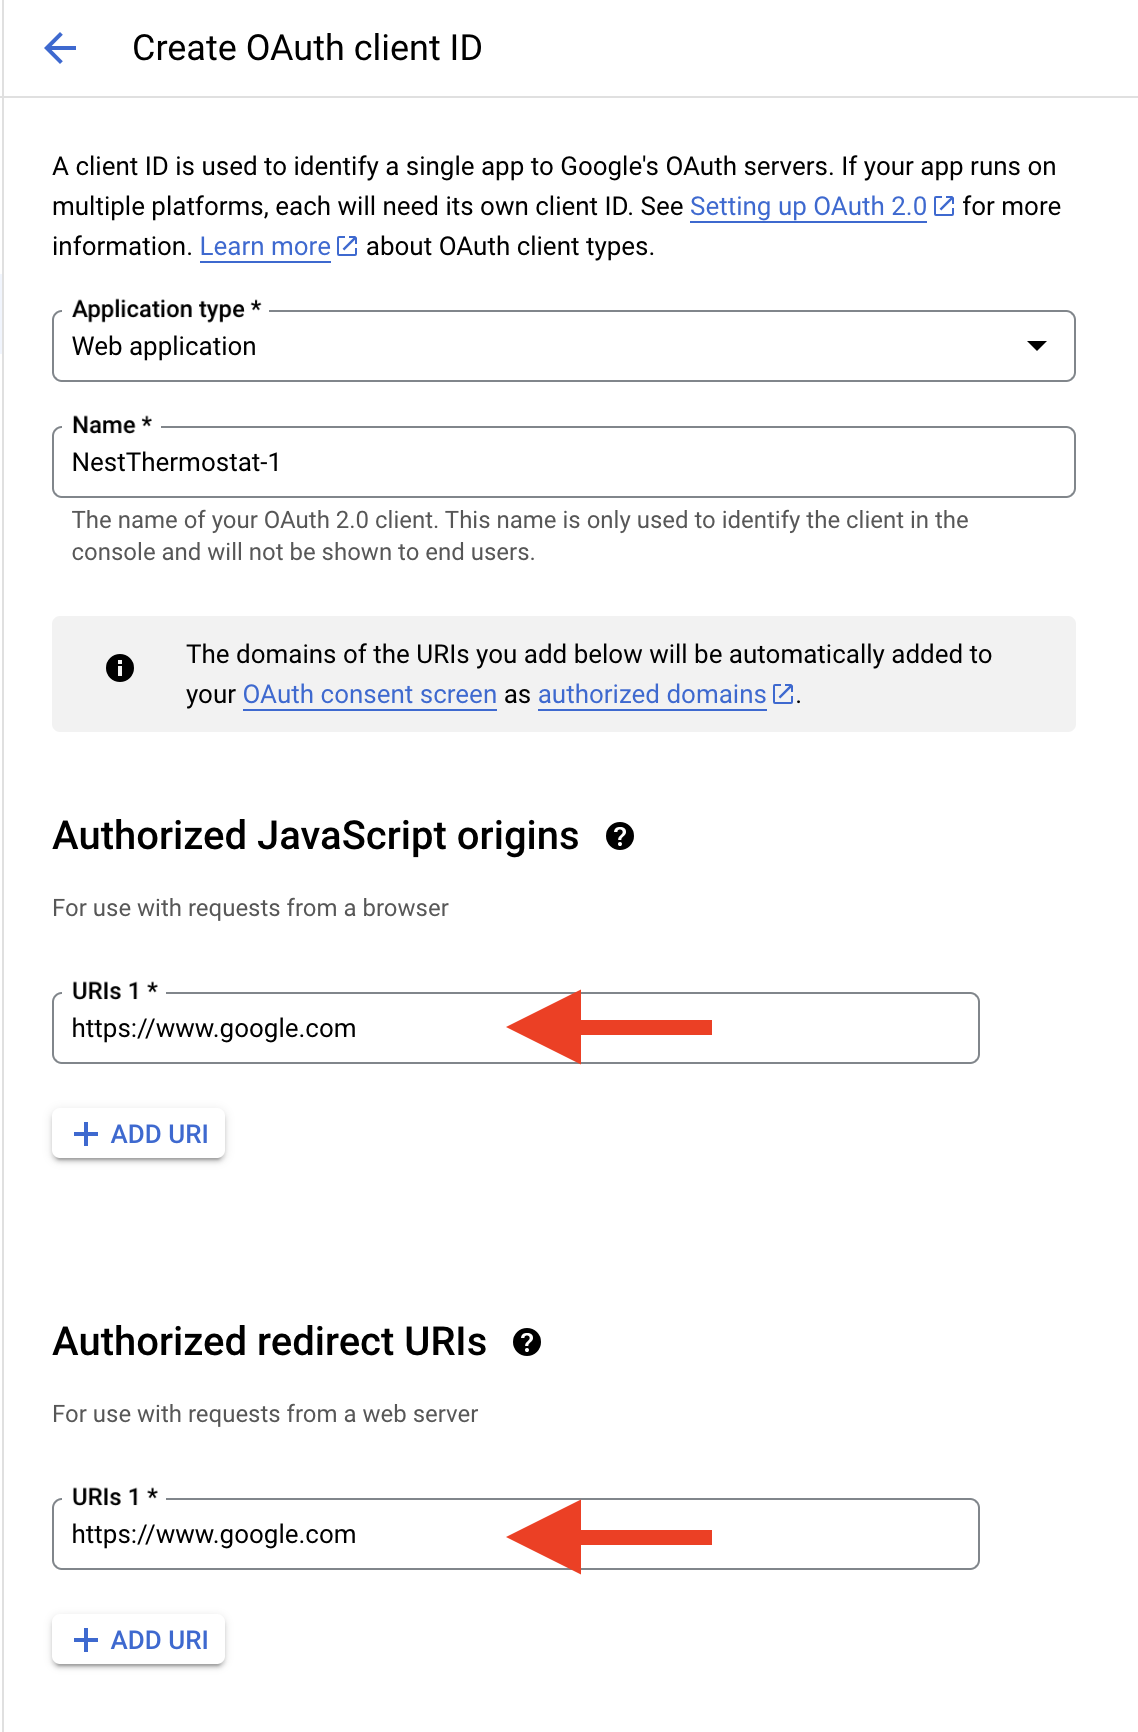
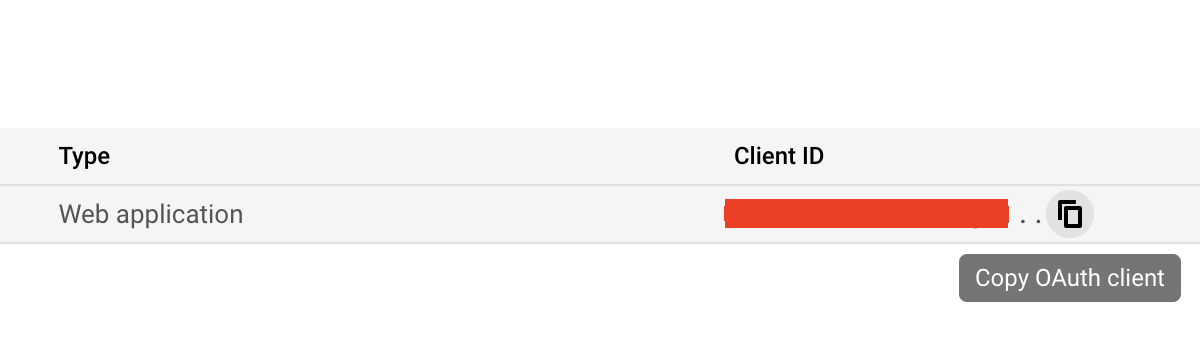
Copy the newly created Client ID.
Next, you'll navigate to the Device Access Console and create a new project. I just called mine homebridge.
On step 3, make sure you enable the pub/sub events.
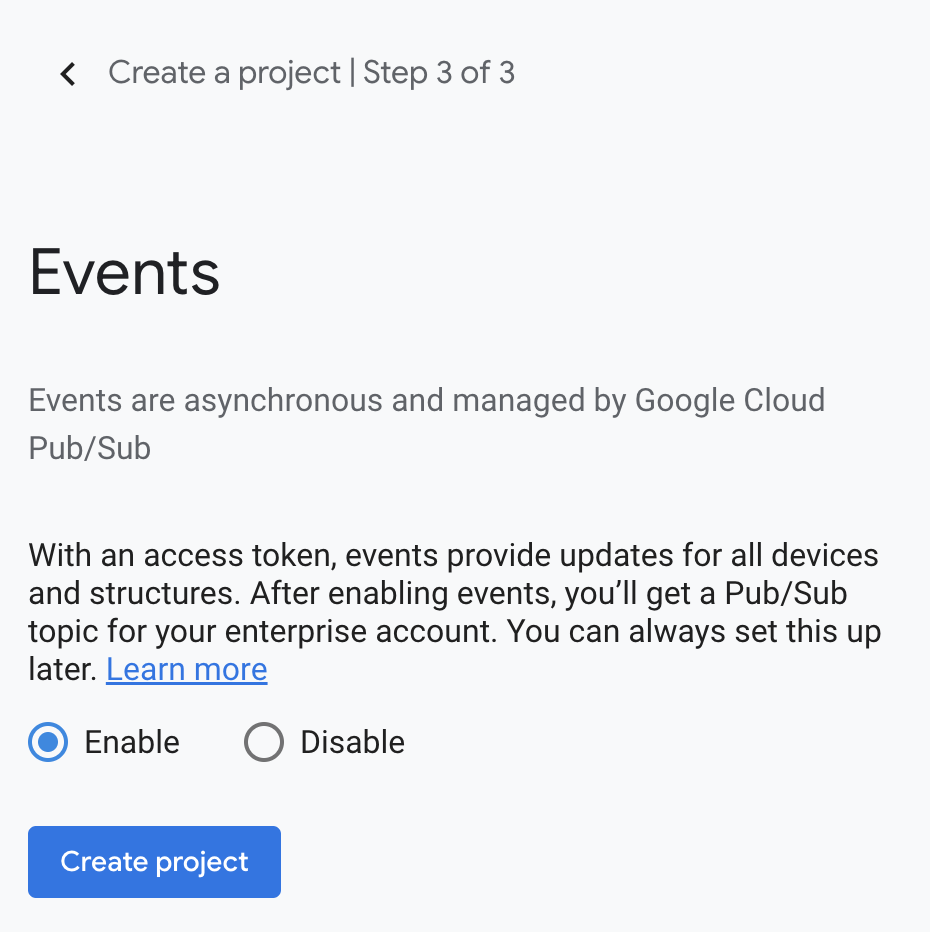
Make note of your Project ID, you'll need this for your homebridge configuration and subsequent steps. Paste this into your plugin's config now!

This next step is intimidating, but bare with me. Follow along exactly and it should go smoothly. Copy the following URL into a text editor and update the fields that start with REPLACE_ME. You'll need your Project ID and your Client ID from the previous steps.
https://nestservices.google.com/partnerconnections/REPLACE_ME_PROJECT_ID/auth?redirect_uri=https://www.google.com&access_type=offline&prompt=consent&client_id=REPLACE_ME_CLIENT_ID&response_type=code&scope=https://www.googleapis.com/auth/sdm.service+https://www.googleapis.com/auth/pubsub
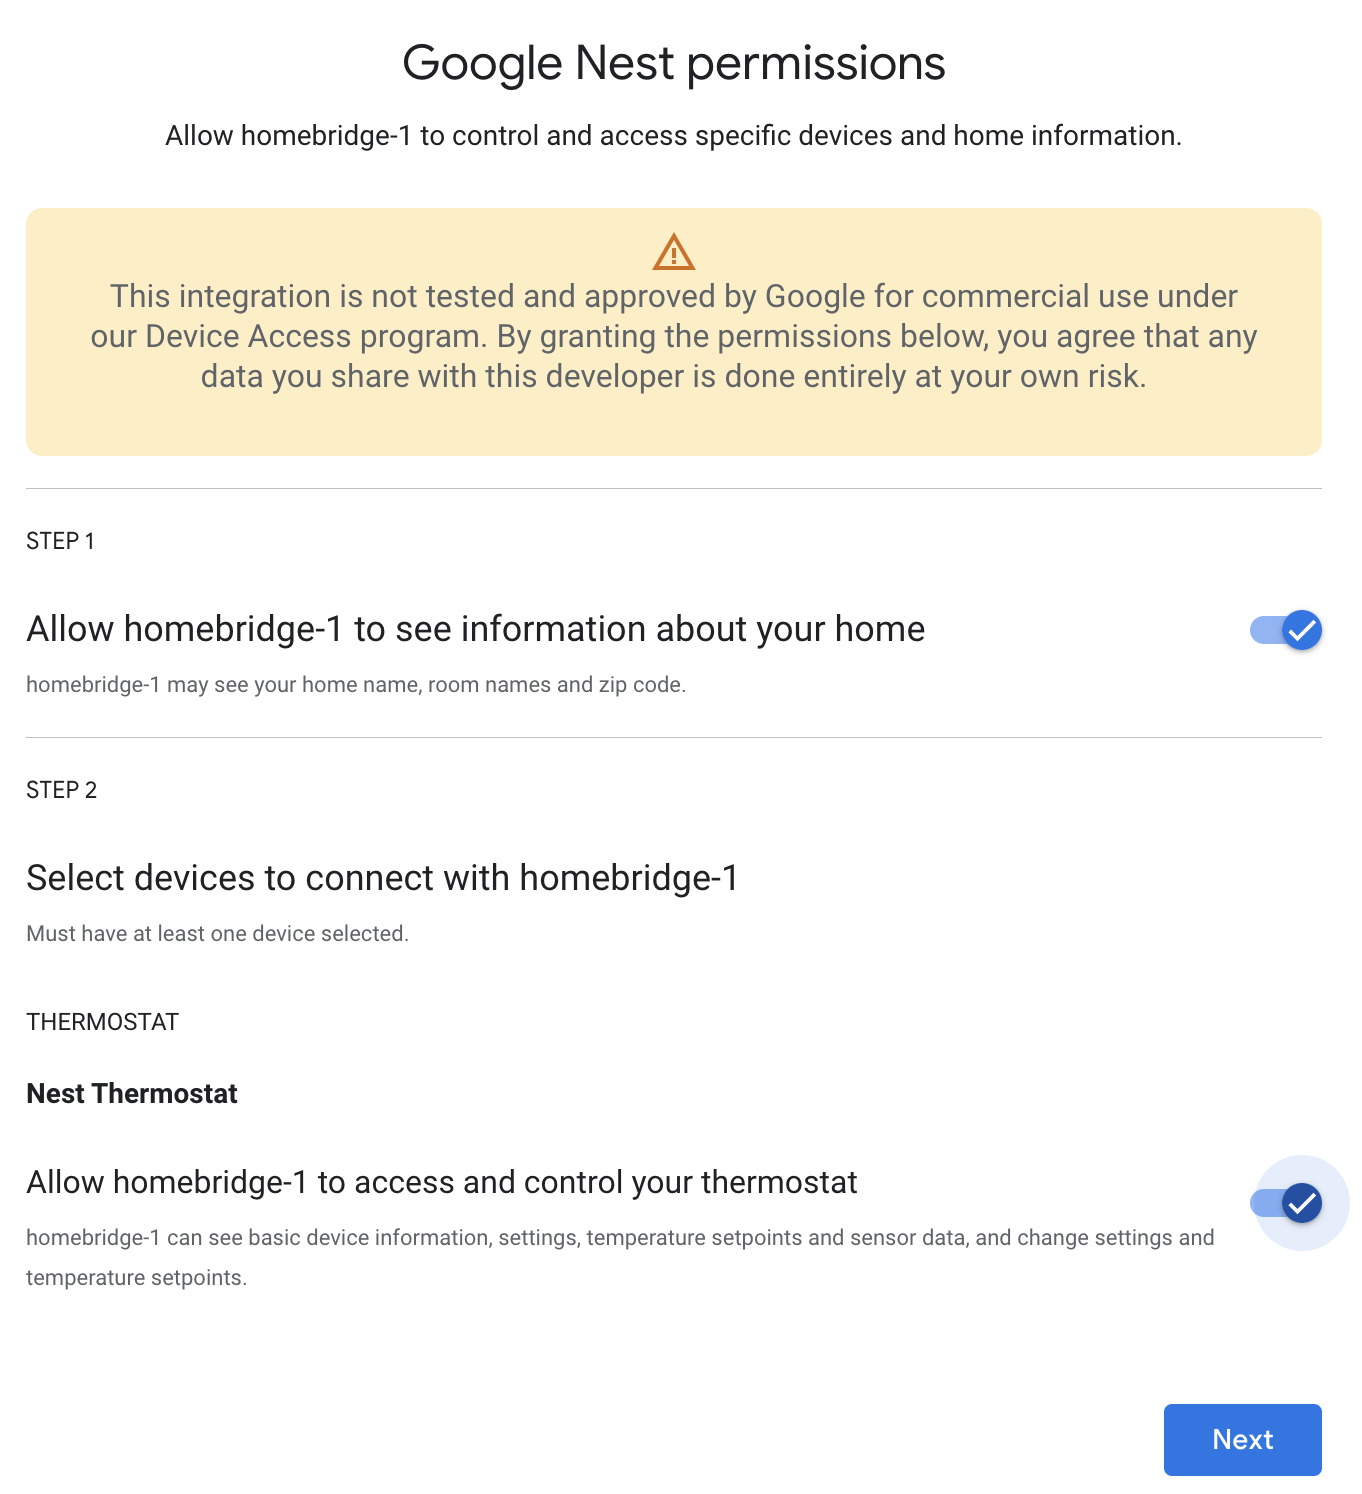
Paste the newly updated URL into a browser. Sign in with your Google account and enable all Nest permissions.
After navigating through the Google auth windows, you'll get a warning that Google hasn't verified this app. You can get past this by selecting Advanced in the lower left corner and choosing Go to Nest Homebridge (unsafe)
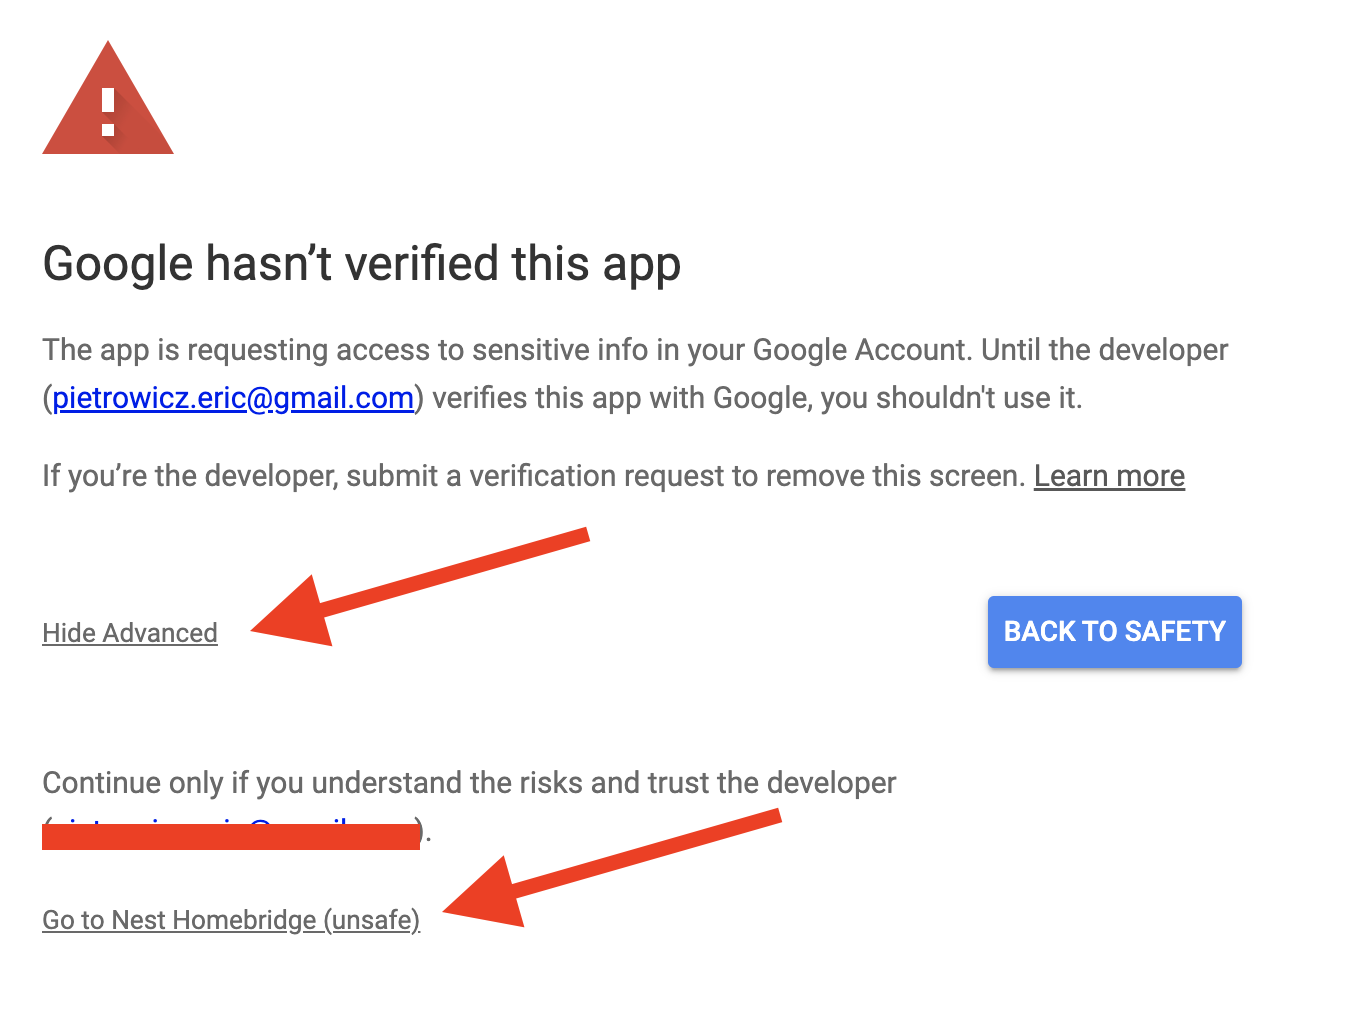
On the next page, confirm that you trust Nest Homebridge.
You should then be redirected, what looks like, google.com. But if you look at your address bar you'll see that the URL is very long. Copy and paste this URL into a text editor. In the URL you should see ...code=your-auth-code&scope=...
Copy the value after code= and before &scope. This is your Authorization Code. You will need this for the next step.
https://www.google.com/?code=COPY_THIS_VALUE&scope=https://www.googleapis.com/auth/sdm.service%20https://www.googleapis.com/auth/pubsub
This next step can look confusing, but is relatively simple. Paste the following into a text editor and replace the values that start with REPLACE_ME.
You will need the Client ID, Client Secret (from the Create Credentials > OAuth Client ID step), and Authorization Code (previous step)
curl -L -X POST 'https://www.googleapis.com/oauth2/v4/token?client_id=REPLACE_ME_CLIENT_ID&client_secret=REPLACE_ME_CLIENT_SECRET&code=REPLACE_ME_AUTHORIZATION_CODE&grant_type=authorization_code&redirect_uri=https://www.google.com'
Open a terminal window (MacOS) or a command prompt (Windows) and paste your edited CURL command into the window. Press enter to run the command. In response you should get the following message format:
{
  "access_token": "YOUR_ACCESS_TOKEN",
  "expires_in": 3599,
  "refresh_token": "YOUR_REFRESH_TOKEN",
  "scope": "https://www.googleapis.com/auth/sdm.service",
  "token_type": "Bearer"
}
You will need the refresh_token entry for your Homebridge plugin configuration. Paste this into your plugin's config now! You will need the access_token in a later step.
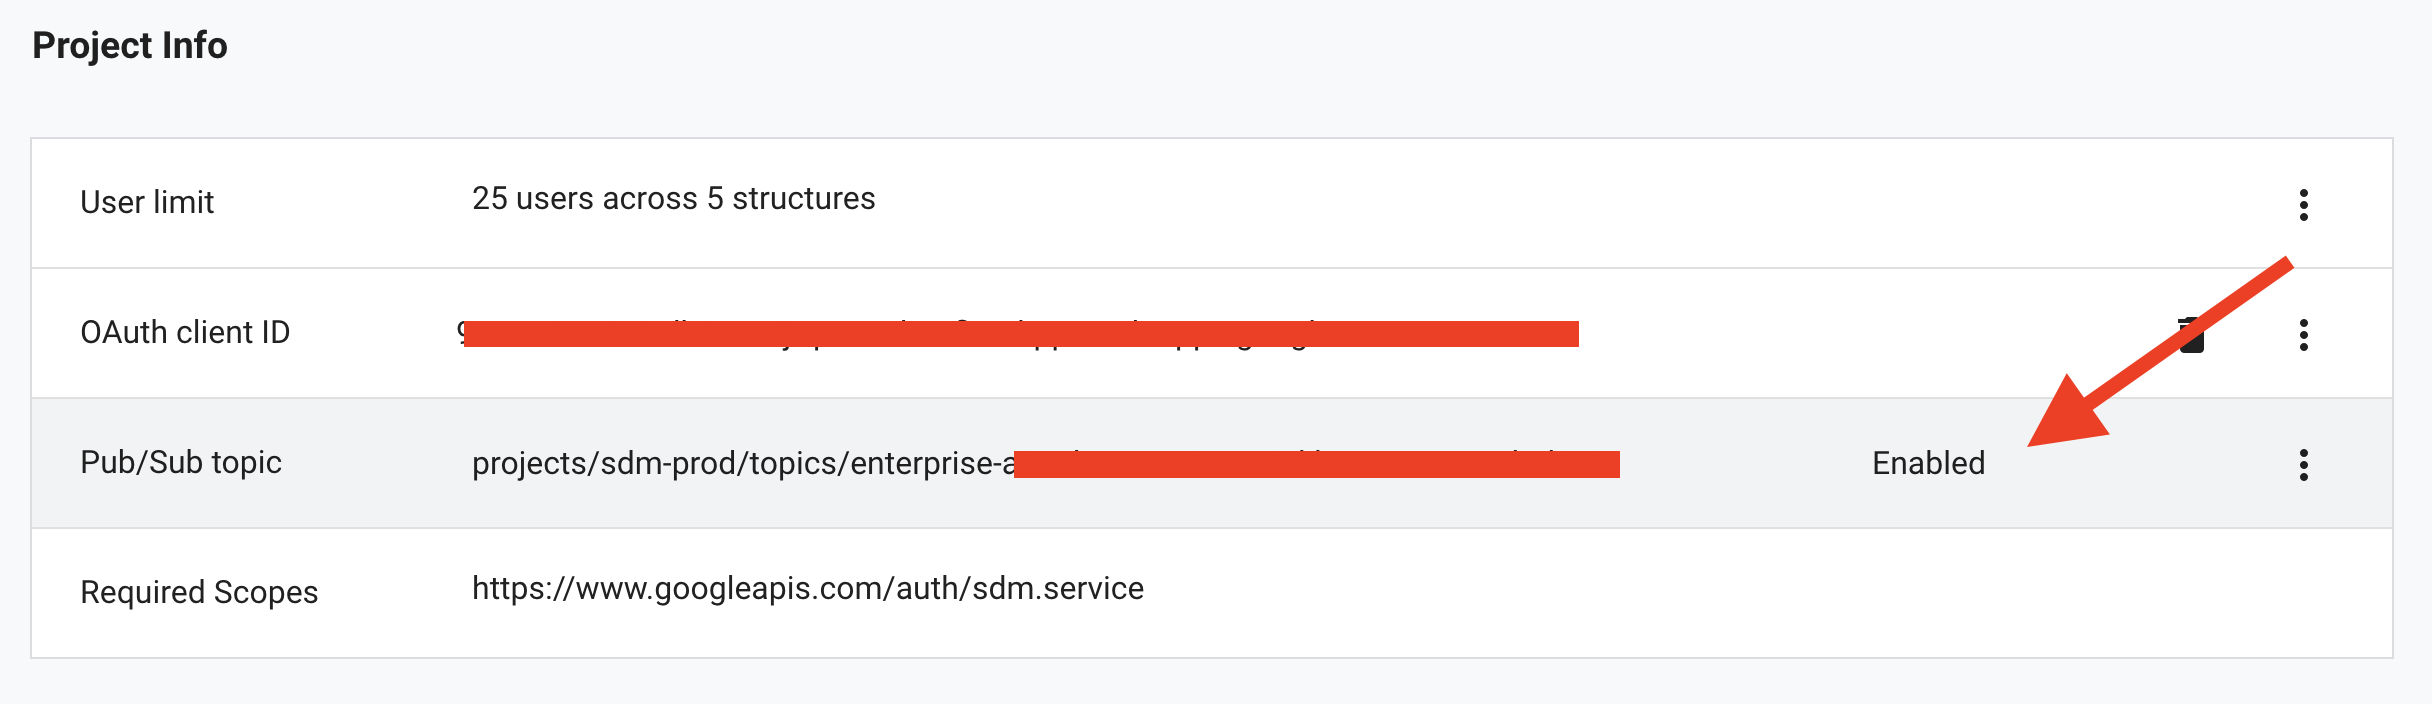
We're almost done. We just need to subscribe to events from the thermostat. Go back to your device access console and in the project info section confirm that the Pub/Sub topic is enabled. You can enable this by clicking the three vertical dots on the right and selecting Enable events.
Next, navigate to this URL to start a Cloud Shell terminal. Make sure your Homebridge project is selected!
Paste the following command into the console replacing the REPLACE_ME_PROJECT_ID value with your project ID. The REPLACE_ME_SUBSCRIPTION_ID value can be any new value. I used my password generator to make a new random string. You will need this value for your Homebridge plugin, paste it there now!
gcloud pubsub subscriptions create REPLACE_ME_SUBSCRIPTION_ID --topic=projects/sdm-prod/topics/enterprise-REPLACE_ME_PROJECT_ID
For the final step, run the following command in your Terminal (or Command Prompt) replacing REPLACE_ME_PROJECT_ID with your Project ID and REPLACE_ME_ACCESS_TOKEN with the Access Token you were granted with the previous CURL command.
curl -X GET 'https://smartdevicemanagement.googleapis.com/v1/enterprises/REPLACE_ME_PROJECT_ID/devices' \
    -H 'Content-Type: application/json' \
    -H 'Authorization: Bearer REPLACE_ME_ACCESS_TOKEN'
That CURL command ensures that everything has been configured correctly and is not strictly necessary.